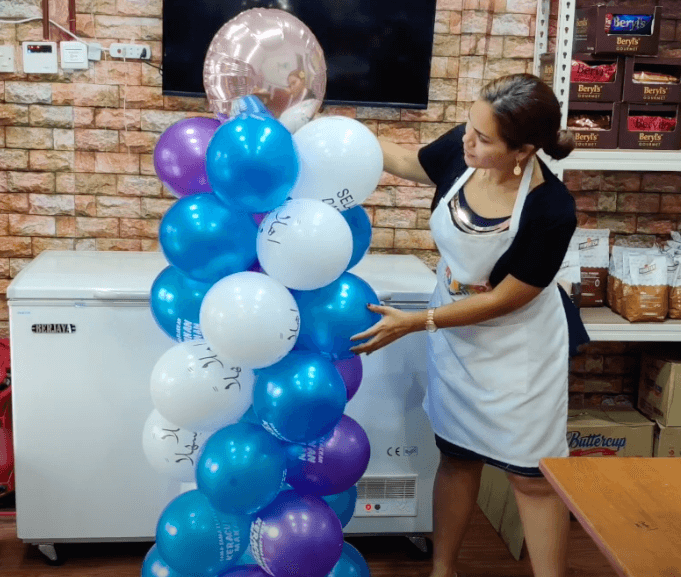
For festive events, you often need to decorate the entrance beautifully. To do this, you can make a balloon arch with your own hands. Let’s see how to make balloon stands!
You will need the following:
- frame;
- compressor or hand pump;
- 3 transparent balloons;
- shiny confetti;
- balloon processor;
- funnel for loose products;
- package of 10-inch classic balloons;
- twine;
- chrome-effect balloons;
- thin plastic wand for balloons;
- 5-inch package of balloons;
- balloons for modeling;
- product to make the balloons glossy.
Preparation Stage
Blow 10-inch balloons. It’s faster and easier to do this with a compressor, but you can also use a hand pump. Tie the balloons together in twos: hold both by their tails, pull one of them off, twist the balloons together 2 times, then just tie the tails together. Tighten carefully: if the latex is dense, the knot is made tighter. It is better to fix the soft material more loosely, so it does not tear.
In total, there should be about 21 pairs of balloons. Take a transparent balloon and process it from the inside to increase its strength and distribute confetti. Insert a funnel in the neck, on which we string the balloon. Pour confetti through it. What has not fallen out, you need to push through with a thin plastic balloon stick gently. Process and fill two more balls through the funnel with confetti. Let’s pair the confetti balloons with the regular balloons by twisting them together.
Take a hand pump and inflate the balloons by 5 inches. Tie the small balloons in pairs and the large balloons using a twist and knot. We need 3 to 4 pairs per rack.
Let’s make some mixed pairs of 5 and 10-inch balls together to make their transition from large to small. There should be 2–3 of these pairs. Inflate the balls at 5 inches on one pump. You will need 10–12 pieces. Tie them into pairs in the same way as the others.
Assemble a Stand
Fix the bottom row of 10-inch balls to the frame: put the first pair on one side and the second on the other side crosswise. Twist the neighboring balls for extra strength. Take the twine and tie it on the frame in a few knots, hiding it behind the bottom row. Pass the twine and tie off all the connections of the balls (a total of 4 knots).
The next row is going to be done using the same principle: the first two on one side, the second on the other are threaded through each other.
The same twine left from the bottom row wraps around all the connections of a new group of balls. The third row is also gathered crosswise, twisted together, and fixed with twine.
The fourth row is fixed in the same way as the previous ones with twist and twine. On the 5th or 6th row, the frame is completed. On top of it, put a 5-inch balloon to cover the sharp part.
On top, fix another 2–3 rows in the same way with twist and twine. Take mixed pairs of 5″ and 10″ balls and make 2–3 rows with them. For the last 1–2 rows, gather from the balls at 5 inches.
Around the last ball, wrap the twine, and tighten it with two knots. Trim off any excess tails.
Let’s take pairs of tiny one-ounce balls and add them to the rack by adding them to different parts. They are tied by the tail of the balls already attached to the rack.
Last Steps
Make a construction heavier. To do this, you need to fill 5-inch balls with water and tie them together. A couple of water balloons are put on the bottom row.
All balls are rubbed with a special product for glitter.
The stand is ready. Since making an arch out of balloons at once is technically difficult, it is better to assemble two such stands and connect them. It is an excellent and original decoration for any celebration.

