

When your lawn mower is sputtering, it’s a clear signal of underlying problems needing immediate attention.
This common issue, often resulting from maintenance lapses, can hinder the machine’s performance.
Understanding the causes and solutions is crucial for any lawn owner.
In this guide, we’ll dive into the reasons behind why a lawn mower is sputtering and offer practical solutions to get your mower back to its best.
Identifying the Causes of Sputtering in LawnMowers
Sputtering in lawnmowers can stem from various issues. Here are the key causes:
- Moisture in the Fuel Tank or Fuel Line
- Clogged or Dirty Air Filters
- Spark Plug Issues
- Dirty Mower Deck
- Using Old or Wrong Fuel
- Filthy and Clogged Carburetor
- Other Carburetor Issues
- Bad Gas Cap
Effective Solutions to Address Lawn Mower Sputtering
Dealing with Old or Wrong Fuel
Incompatible fuel types can degrade engine components, leading to sputtering. Imagine using fuel with high ethanol content in your mower.
This often leads to decreased power and sputtering. The solution? Switch to ethanol-free gas to enhance performance and protect your mower’s engine.
Addressing Clogged Air Filters
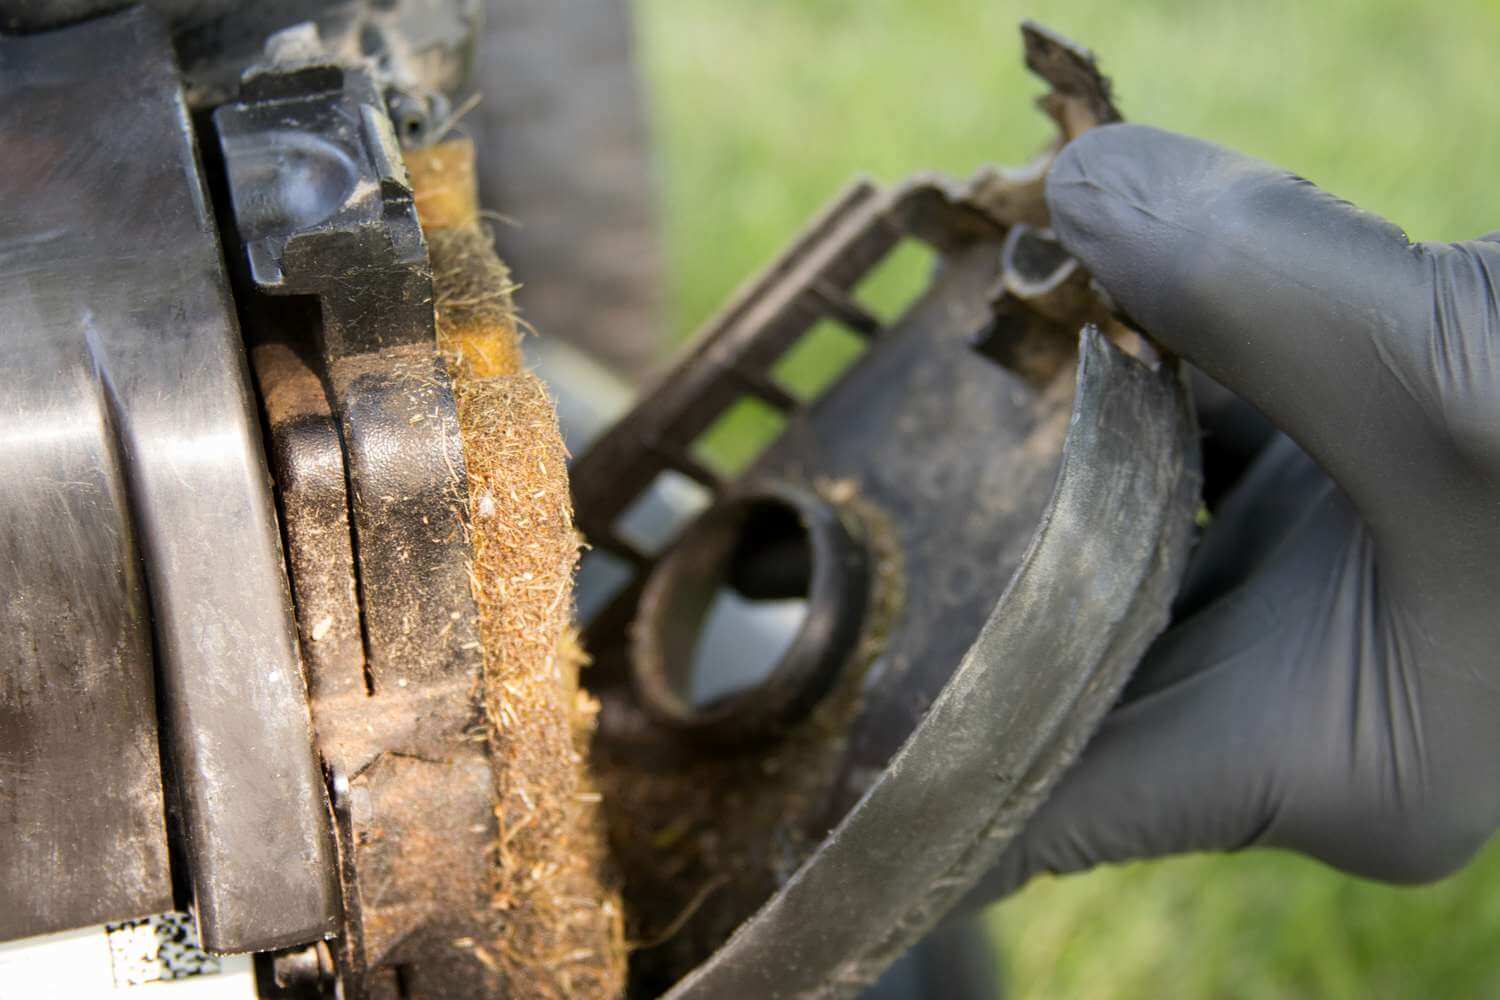
A clogged or dirty air filter is a common issue leading to lawn mower sputtering. Air filters play a crucial role by pulling in air from the surroundings and mixing it with fuel in the engine.
When these filters are obstructed, the airflow to the carburetor is hindered, impacting the engine’s fuel-air mixture balance. This imbalance is often what causes the mower to sputter, as the engine struggles to operate efficiently with a disrupted air supply.
Cleaning or replacing the filter can swiftly restore your mower’s efficiency.
To clean or replace a clogged air filter in a lawn mower when it’s sputtering, you can follow these steps:
- Remove the Air Filter: If it’s a foam filter, wash it with soap and water. If it’s a paper cartridge filter, inspect the pleats, and if moderately dirty, clean it. If heavily soiled, replace it.
- Cleaning Frequency: Clean the air filter every few times you mow, especially after working in dusty conditions. It’s also recommended to clean or replace the air filter as part of the process of winterizing the lawn mower. Manufacturers often recommend checking and cleaning the air filter after 25 hours of use and replacing it every three months.
- Preventive Measures: To prevent sputtering, use ethanol-free gas or fuel stabilizer, inspect the fuel and air filters regularly, check the spark plug, and fill the tank with the right type of fuel.
- Additional Tips: Ensure the air filter housing is securely in place after cleaning or replacement to prevent debris from entering the engine
Fixing Dirty Fuel Filters
If your mower starts sputtering intermittently, consider checking the fuel filter. A dirty filter can disrupt fuel flow. Clean or replace fuel filters to maintain consistent gasoline flow.
To clean or replace a dirty fuel filter in a lawn mower, you can follow these steps:
- Shut off the fuel valve or clamp the gas line.
- Remove the metal clips on each side of the filter, using needle-nose pliers, and slide the filter out.
- If it is a tube-style filter, rinse the meshed end carefully with water until it’s clear, or replace it with a new filter. If it is a canister-style filter, replace it with a new filter.
- Reconnect the metal clips on both sides of the filter.
- Remove the clamp on the fuel line or reopen the fuel valve when the fuel filter is secure.
Resolving Issues with a Faulty Gas Cap
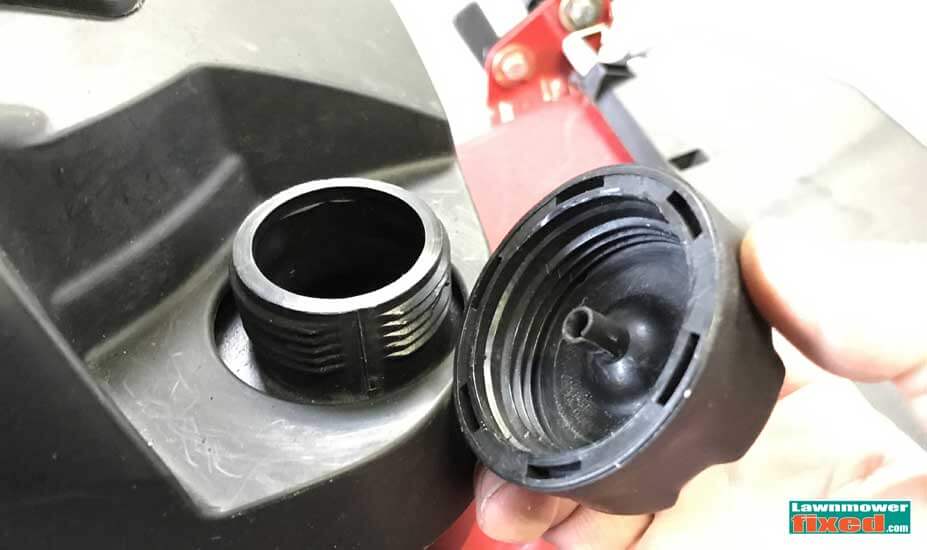
Stalling mowers are often plagued by a damaged gas cap. Inspecting and replacing a cracked or poorly ventilated gas cap can eliminate frequent stalling.
Locate the Gas Cap: Identify where the gas cap is on your lawn mower. It’s usually on top of the fuel tank.
Inspect the Gas Cap: Check for Visible Damage: Look for any cracks, breaks, or warping on the gas cap. Damage can prevent it from sealing correctly.
Examine the Vent: Gas caps often have a small vent to allow air into the tank and prevent a vacuum. Ensure this vent is not clogged or blocked.
Test the Seal: If the cap screws on, make sure it fits snugly and seals properly. A loose cap can lead to fuel evaporation and contamination.
For mowers with a push-down style cap, press down to see if it springs back up. If it doesn’t, the seal may be compromised.
Replace if Necessary: If you find any issues with the gas cap, it’s best to replace it. Purchase a new gas cap specific to your lawn mower’s make and model. Using the wrong type of cap can cause more issues.
Installing the New Cap: Simply screw the new cap on or press it into place, depending on the style. Make sure it’s secure and properly vented.
Final Check: After replacement, monitor your mower for a short period to ensure that the issue is resolved and there are no signs of fuel leakage or sputtering.
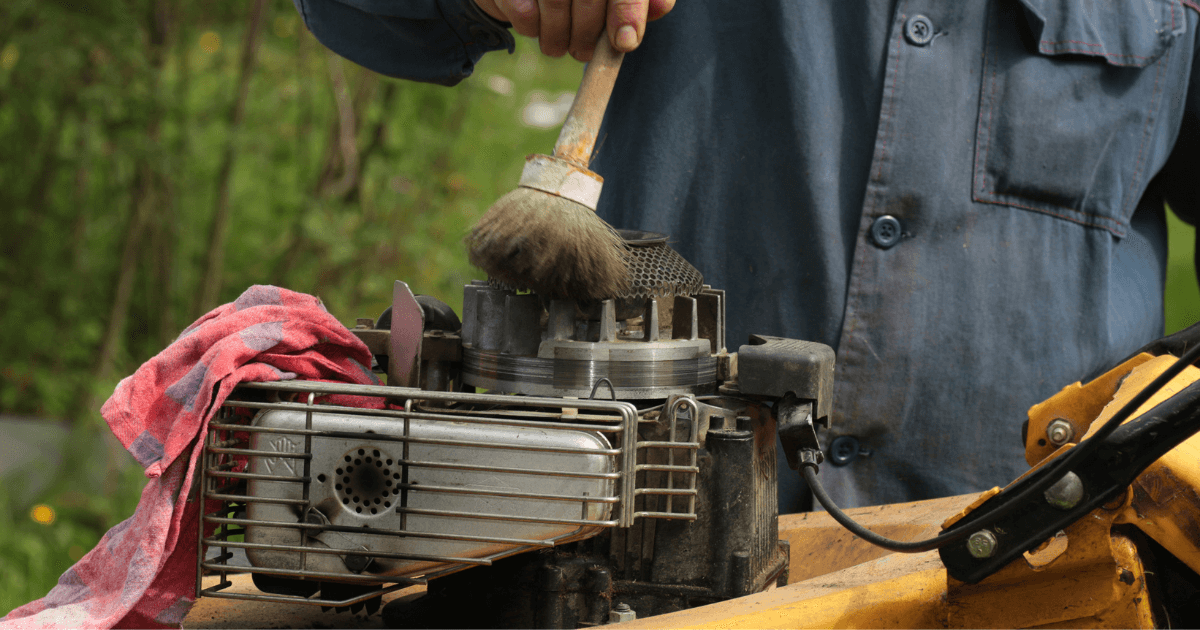
Cleaning a Filthy Carburetor
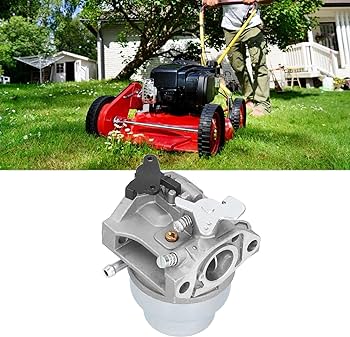
Sputtering and stalling can indicate a carburetor clogged with gunk. Regular cleaning with a carburetor cleaner can prevent these issues, ensuring smoother mower performance.
- Safety First: Before starting, ensure the lawn mower is off and the spark plug is disconnected to prevent accidental ignition.
- Access the Carburetor: Remove the air filter cover and the air filter itself to access the carburetor.
Depending on your mower model, you may need to remove a few more parts to get full access to the carburetor. Refer to your mower’s manual for specific instructions. - Remove the Carburetor: Carefully disconnect the fuel line. Be prepared for a small amount of fuel to spill out.
Unscrew any mounting bolts and gently remove the carburetor from the engine. - Disassemble the Carburetor: Take a picture or make a note of the assembly for reference during reassembly.
Carefully disassemble the carburetor. Remove the float bowl, float, and the carburetor’s needle, being mindful of any small parts like springs or gaskets. - Clean the Components: Use carburetor cleaner spray to clean each part. For stubborn deposits, a soft brush can be used.
Pay special attention to cleaning the jets and passages where clogs are most likely to occur. Ensure all the tiny holes and passages in the carburetor are clear. - Reassemble the Carburetor: After cleaning, reassemble the carburetor using your notes or the picture as a guide.
Replace any worn gaskets or O-rings to ensure a good seal. - Reinstall the Carburetor: Carefully mount the carburetor back onto the mower.
Reconnect the fuel line and any removed parts. - Test Your Mower: Reconnect the spark plug.
Start the mower to check if the cleaning resolved the issue. The engine should run smoother if the carburetor was the problem.
Removing Water from the Fuel Tank/Fuel Line
Water entering the fuel system, especially during rainy seasons, can cause sputtering. Thoroughly draining and drying the fuel tank and lines is essential to resolve this.
Replacing a Worn Spark Plug
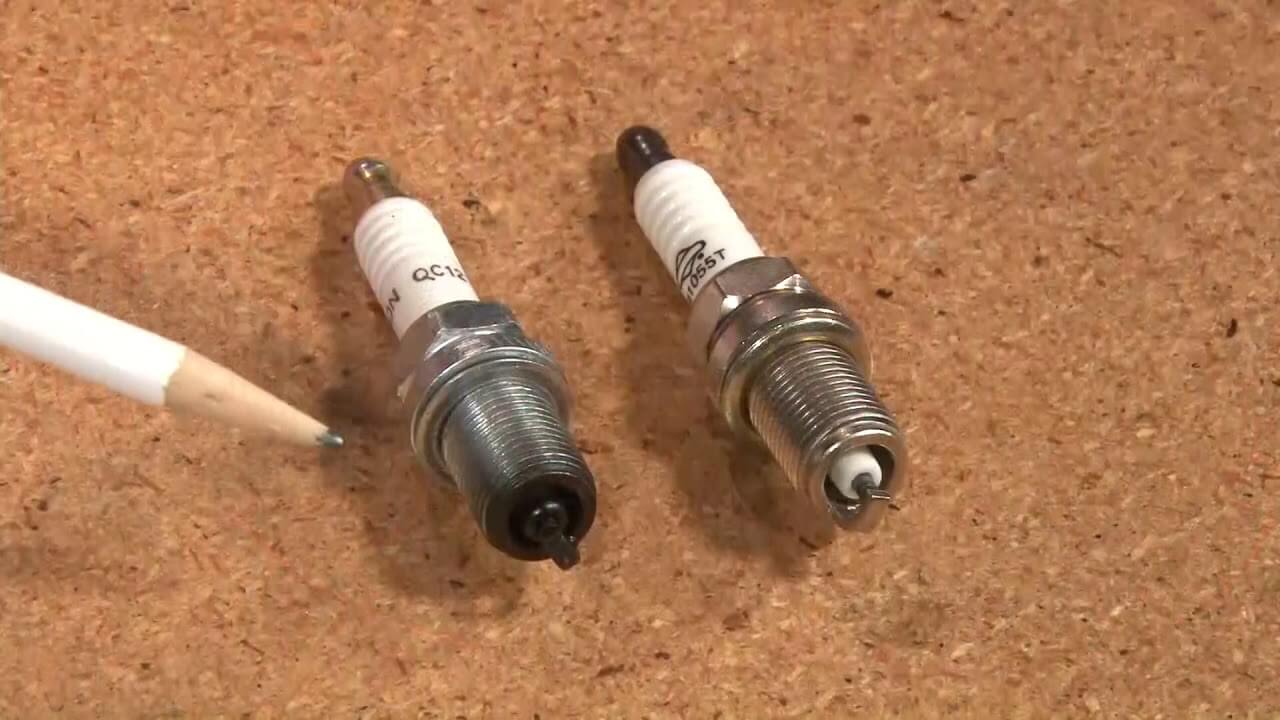
Difficulty in starting a mower is often due to a worn spark plug. Regular inspection and replacement can make starting your mower a breeze.
- Remove the Old Plug: Use a spark plug socket to unscrew and remove the old spark plug.
- Install the New Plug: Check the gap on the new plug, adjust if necessary, and screw it in by hand first, then tighten with the socket without over-tightening.
- Reconnect: Attach the spark plug wire to the new spark plug.
Managing Carburetor Complications
An uneven running mower suggests carburetor issues, possibly due to an imbalanced fuel-air mixture. Seeking professional help for carburetor adjustments can ensure optimal performance.
Final Thoughts
Tackling the issue of a sputtering lawn mower involves understanding the root causes and applying the right solutions.
From choosing the correct fuel to regular maintenance of the air filters, spark plug, and carburetor, each step is crucial in keeping your mower running smoothly.
Remember, regular checks and timely interventions can prevent most sputtering issues, saving you time and ensuring the longevity of your lawn mower.
With these insights and fixes, you’re well-equipped to handle any sputtering problems and maintain a beautifully manicured lawn.
FAQ: Additional Insights on Lawn Mower Sputtering
What Role Does a Fuel Pump Play in Lawn Mower Sputtering?
Fuel pumps can be tricky to diagnose. If the fuel flow through the pump is inconsistent or slow, it might be the cause of sputtering. Check by removing the outflow fuel line from the pump and observing the fuel flow while turning over the engine.
Can a Damaged or Dirty Fuel Line Cause Sputtering?
Yes, cracked, damaged, or clogged fuel lines can hinder the proper flow of fuel to the engine, leading to sputtering. Over time, these lines can deteriorate or become obstructed, affecting the mower’s performance.