

Nothing beats the feeling of a tidy, organized kitchen. Cleaning up your kitchen could be as easy as getting rid of old food and spices, or it might involve bigger tasks like deep cleaning your Forno appliances. We want to help make your next kitchen clean-up a breeze, whether you’ve got a quick five minutes or a whole day to spare.
Check out our kitchen spring-cleaning checklist and handy cleaning tips to help you tackle the job and spruce up your food prep space.
Declutter Your Space
Decluttering your kitchen space is the first step toward creating a more organized and functional cooking area. Start by tackling the countertops, drawers and cabinets, methodically removing any items you no longer use or require. This includes expired food items, seldom-used kitchen tools, mismatched containers without lids and outdated gadgets that have been replaced by newer technology.
When you come across items that are still in good condition but no longer necessary for your kitchen, consider donating them to a local charity or offering them to friends and family.
Once you’ve emptied your cabinets and drawers, wipe them down inside and out, using a disinfectant solution. This will help remove debris and bacteria, giving you a fresh, hygienic space to put all the items you plan to keep.
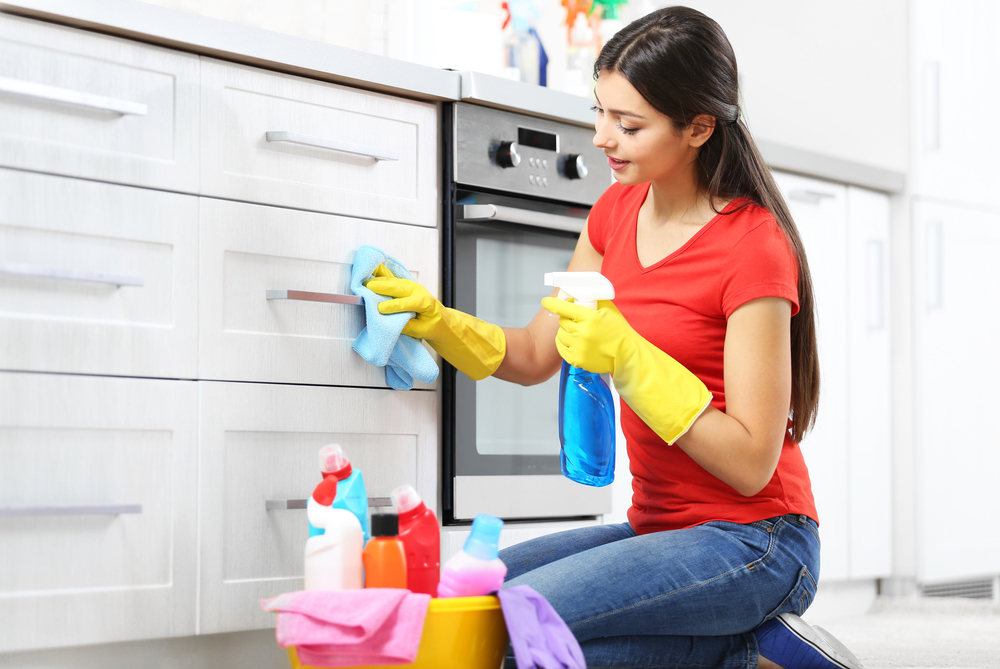
Deep Clean Appliances
Deep cleaning your kitchen appliances ensures they operate efficiently, saving energy and reducing potential repair costs. Over time, grease, food particles and dust can build up, affecting performance and even posing a fire risk in extreme cases.
A thorough clean eliminates harmful bacteria and germs, promoting a healthier cooking environment. This is especially important for appliances that come into direct contact with the food we consume — like refrigerators and ovens.
Important appliances to deep clean include:
- Refrigerator. Start by emptying your fridge and tossing out any expired items. Next, remove shelves and drawers to wash them with soapy water. Wipe the interior with a sanitizing solution, then dry and replace everything. Also, don’t forget to pull your fridge out from the wall and dust the condenser coils at the back; this will prevent the motor from overheating.
- Oven. If your oven has a self-cleaning function, remove the oven racks and run the program. If it doesn’t self-clean, apply a cleaning solution inside, let it sit and then scrub and wipe away. Place the oven racks in a warm, soapy water or mild degreaser solution and let them sit for several hours. Remove and scrub with a scourer to remove loosened grease.
- Microwave. For a sparkling microwave, mix water and vinegar or lemon juice in a microwave-safe bowl and heat until steamy. This loosens grime, making it easy to wipe away.
- Dishwasher. Start by removing and cleaning the filter with warm, soapy water. Then, place a cup of white vinegar on the top rack and run a hot cycle. Sprinkle baking soda on the bottom and run a short cycle.
Sanitize Countertops and Surfaces
Breathe new life into your cooking space and make it more inviting and hygienic by sanitizing your countertops. Start by removing all items from the countertops, including appliances, so you can reach every nook and cranny.
Use a cleaning solution suitable for your countertop material — gentle soap and water for most surfaces, a mild bleach solution for tougher stains on non-porous materials or special cleaners for granite and marble to avoid damage. Apply the cleaner with a soft cloth, scrubbing gently to remove any food particles or stains. Don’t forget the backsplash and areas around the sink where grime tends to accumulate.
For extra shine on stainless steel surfaces, a microfiber cloth with a bit of olive oil will do the trick, removing fingerprints and smudges. Once everything is sparkling, dry the surfaces with a clean cloth to prevent streaks, and then replace your items, organizing as you go for a clutter-free kitchen.
Clean the Sink and Faucets
To make your sink and faucets sparkle, start with a baking soda and vinegar mix for a natural, effective cleanse, or opt for your favorite commercial cleaner. Focus on scrubbing around the drain and disposal areas, where grime loves to hide. For faucets, wipe them down with a vinegar-dampened cloth to remove water spots and build-up, and then buff with a dry cloth.
For a fresh-smelling garbage disposal, run it with ice cubes and lemon peel. This sharpens the blades and also leaves behind a fresh, citrus scent. Then, pour a mix of baking soda and vinegar down the drain, wait a few minutes, and then flush with hot water.
Wash Windows and Treatments
To make your kitchen windows and treatments sparkle, start by carefully removing any curtains, drapes or blinds. Machine wash curtains if the fabric allows, using a gentle cycle and mild detergent; for blinds, a damp microfiber cloth does wonders, especially when you run it across each slat to capture dust. For more thorough cleaning, a vacuum with a brush attachment can gently remove dust from both fabric treatments and blinds.
For the windows, create a solution of warm water mixed with a splash of white vinegar. This natural mixture cuts through grease and grime without leaving streaks. Use a soft microfiber cloth to apply the solution, ensuring you reach into all the corners and along the window tracks. A rubber-bladed squeegee can efficiently remove the solution from the glass, preventing streaks and speeding up the drying process. Wipe down the sills and frames with the same vinegar solution to catch any accumulated dirt. Once everything is clean and dry, rehang your window treatments.

Deep Clean the Floors
Deep cleaning your kitchen floor transforms it from grimy to gleaming, making your kitchen feel fresher and more inviting. First, clear the floor by moving chairs and trash bins out of the way. Sweep or vacuum thoroughly to pick up crumbs, dust and pet hair. Don’t forget to sweep under free-standing ranges like those in ZLINE appliance packages.
Next, tackle tough spots with a mix of warm water and mild detergent or a floor-specific cleaner; use a scrub brush for stubborn stains. For tile floors, a grout cleaner can bring back the grout’s original color.
After spot-cleaning, mop the entire floor with a microfiber mop to avoid streaks, starting from the farthest corner and working your way toward the exit. Rinse the mop frequently to ensure you’re not spreading dirt around. Finally, allow the floor to air-dry or dry it with a clean towel.
Safety Check: Wrapping Up Your Kitchen Spring Clean
As you conclude your thorough spring cleaning, it’s the perfect moment to address an often-overlooked aspect of kitchen upkeep: safety. Take this opportunity to check the batteries in your smoke detectors. Also, verify that your fire extinguisher is not only accessible but also within its expiration date.
By taking these steps, you’re not just completing your kitchen spring clean; you’re also creating a safer environment for yourself and your loved ones.