
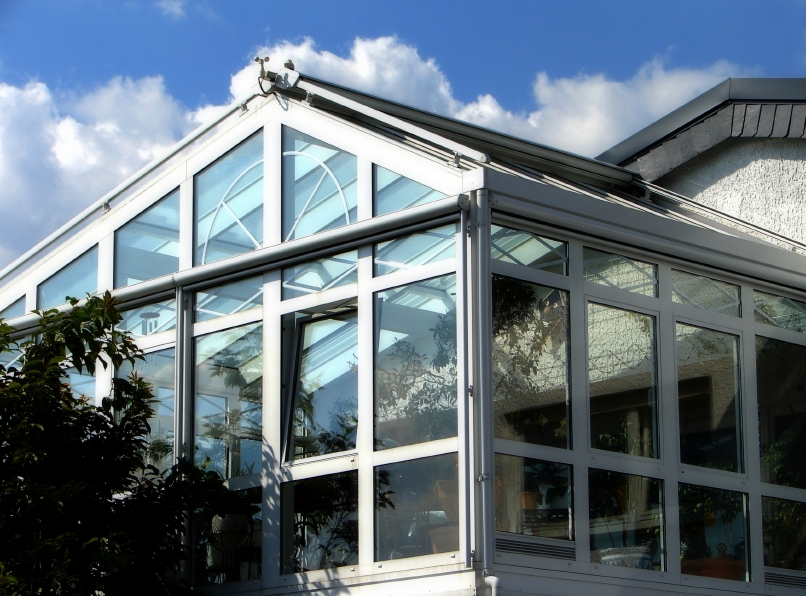
A sunroom is a great idea to add a cozy corner to enjoy lazy Sunday afternoons or a winter holiday, especially if you want a warm and comfortable corner, even in shivering cold weather.
Speaking of the options to build a sunroom, there are three broad options.
You can either start from scratch and finish all the work by yourself or take the help of a sunroom kit.
The last option is to hire a professional and let them do the work while you sit back and relax.
In this post, we will discuss how you can build a sunroom on your own with the help of a sunroom kit.
After all, in this century, knowing how to do your work is always a smart idea.
Let us begin!
Things to Keep in Mind While Building Your Sunroom
If you are not building the sunroom on your existing porch and planning to extend it, then there are a few things you need to consider before proceeding.
- The first thing you need to do is consult the local authority body and check if it is permittable for you to extend. If you are not doing this in the beginning, there could be serious trouble later, which can lead to fines and road blockage issues, and you can also be ordered to demolish the extended part of the sunroom.
- If you are planning to build the sunroom on the side where you have a neighbor, consult them and let them know about your plans and ensure no issue arises later, especially regarding plot sharing.
- The third thing that you should keep in mind is to choose the right sunroom kit. Sunroom kits are in great demand, especially because they give you so much control over how you want your sunroom to be built and save much of the labor charges. Owing to its popularity, many types of sunroom kits are available in the market, but that does not mean that all of them are perfect for you. Materials like PVC and glass might look great, but they will not provide a durable and sturdy solution, and any strong storm can destroy it. Make sure you choose something more reliable and stronger, like aluminum and wood.
- Your sunroom will also need extra electrical outlets for basic appliances like bulbs and fans. Consult a local electrician for planning the electrical outlets, and make sure you calculate the cost of adding these to your overall cost.
Some Ways to Build a Sunroom
Even when selecting the right place to build your sunroom, there are a handful of options that you can choose from.
1. Building the Sunroom on An Existing Porch
The most economical option is to build your sunroom on an existing porch.
The reason behind this is that you already have an existing roof and a base floor, all that you need to do is put up the frames on the side, add the windows and new flooring and jazz it up a little.
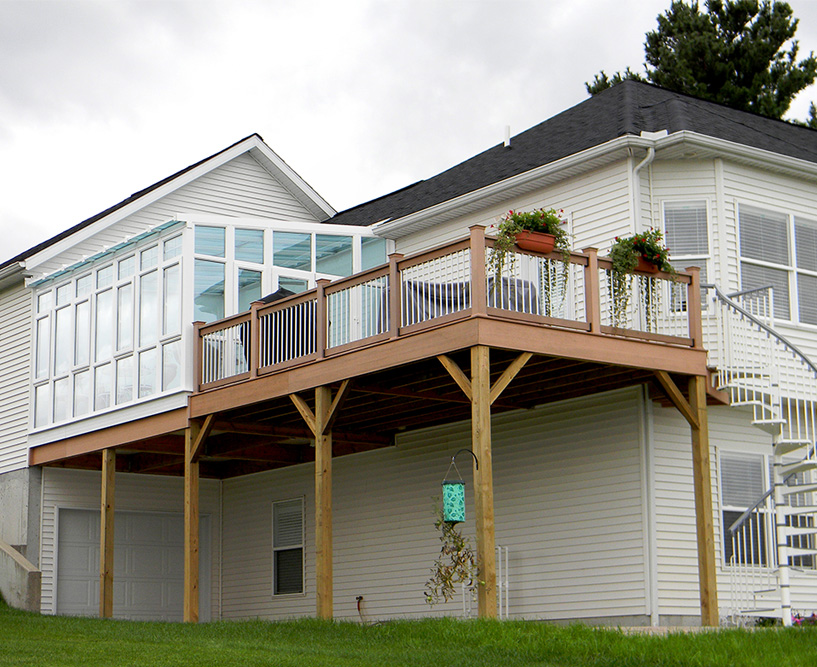
2. Building a Sunroom on Your Deck
If you do not want to build the sunroom on the porch or, let’s say, you do not have a porch, then another great alternative is to build it on your deck.
Although there might not be a roof over your head, the base floor certainly makes it an economical choice.
Just make sure you consult a local builder and get your deck checked to ensure it can bear the weight of a sunroom.
3. Building the Sunroom on Your Patio
The patio has a different foundation, like building your sunroom on the deck.
In case you find out that your deck is not strong enough to bear the weight of a sunroom, then your patio can be a great option, too.
4. Building a Sunroom from Scratch
If none of the above options suit your needs, then the last and best option that you have is to build the sunroom from scratch.
Design a plan according to your requirements, select a suitable location, and choose the window and flooring style per your requirements.
Building a DIY Sunroom with a Sunroom Kit
So now we will discuss the steps involved in building the sunroom.
Although there are several options in hand, and the process will differ slightly based on which area you choose for the construction (porch, patio, deck, or an empty plot), we will explain the basic and general steps involved in the construction.
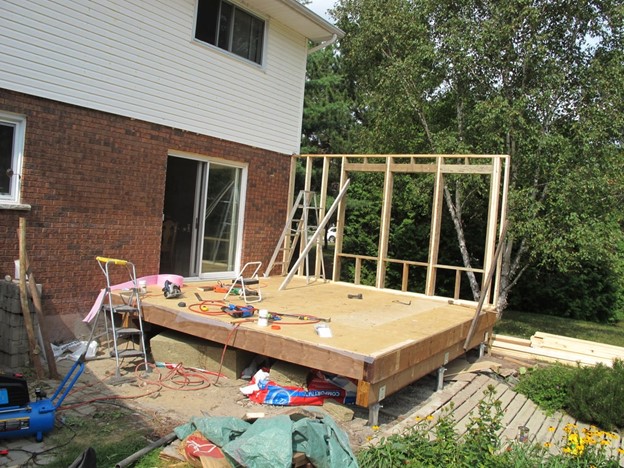
1. Prepare the Area and Mark the Boundaries
The first step of building a sunroom is to clear the area, demolish and remove existing structures, if any, and mark the room’s boundaries and layout.
The markings will help you determine the dimensions and proportionate each side.
2. Lay Down the Post Holders and The Support Beam
Here comes the foundation of your sunroom. At first, you will need to secure the post holder on the ground to provide support for the beams.
Then, placing the beams on the post holder horizontally would be best.
Make sure that all the beams are of equal dimensions and are at par with each other and your house.
Apart from their dimensions, you must adjust the height of the support holder to ensure the flooring is even.
3. Lay Down the Flooring
The next step is to prepare the floor. You will need two sets of lumber for that, whose dimensions will depend on the existing dimensions of your house.
You will need to drive one set from the supporting beam and connect it to the framework of your existing house’s basement.
Then, place the second set of numbers and cut it to fit the previous set. It will look something like this-
This crisscross framework will provide the support that your sunroom floor will need to bear the weight.
4. Attaching Metal Screen
This is a very important part that you cannot afford to ignore.
You must attach metal screens to the floor framework to prevent mice from entering the insulation between the logs.
The holes should be small enough to prevent mice from entering, and ensure you do not put vapor barriers.
This will trap the excess moisture and make the wood rot.
5. Lay Down the Floor Insulation
The next step is to lay down the floor insulation to protect it from mice and moisture.
6. Next Comes the Vapor Barrier
Now comes the vapor barrier. This should only be placed on top of the insulation layer, and it helps protect the wood from excess moisture.
7. Lay Down the Sub-Floor
The next step on the floor is to lay down the subfloor.
You can go for a plywood subfloor but make sure you secure it with screws on all the sides properly to avoid squeaky floors.
8. Place the Walls
The next step that you must follow is to place the walls. For this, you must secure the individual plywood on the base.
Start from the corners and secure them tightly with the screws to ensure durability, and then fill in the gaps with equally spaced studs.
When fixing the plywood for the walls, you have already planned out the space for the windows and left adequate space accordingly.
Once the framework of the walls has been built, place the sheeting on the outside wall, and remember to place a foam gasket between the brick of your house and the plywood of the sunroom that is touching the house.
Then it would be best if you drove bolts through that plywood to fix it to the existing house.
Make sure you seal the remaining gap with an insulation foam spray.
9. Placing the Ridge
In the next stage, you will have to place the ridge. The ridge will form the basic framework of the roof that supports the entire roof framework.
Make sure you place the ridge on one of the supporting beams. The reason is that if you place the ridge in any other place apart from the supporting beams, then the pressure will be too much for the supporting framework to bear.
Hence, to ensure a strong build, place the ridge directly on top of a support that can balance the ridge’s weight.
Make sure you calculate the slope of the roof before placing the ridge. The height of the ridge also plays an important role in the resultant slope of the roof.
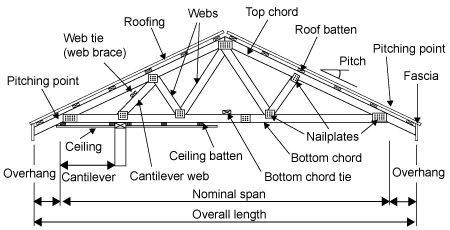
10. Placing the Rafters and The Hangers
In this step, once the ridge has been placed, place the rafters, but before you do that, ensure you have secured the hangers.
The hangers are a very important part of the construction of your roof because these wooden structures will support the weight of the rafters.
You will see that once you are done placing the rafters, the extended part, also known as the fascia, will hang out.
You can cut off these extra parts later. If you have any doubts regarding the names of the different parts of a roof framework, refer to the diagram below.
11. Lay Down the Roof Sheeting and Shingles
Now, you will have to put on the roof sheeting. Also, you will have to secure the sheeting and place clips between each rafter.
Putting “ice and water” rolls along every edge would be best. Then, you will need to attach drip mold along every edge.
Once you finish the roof sheeting, attach the shingles or whichever roofing you use.
12. Prepare the Wall
In the next step, if you are planning to keep a wooden wall, then you will need to lay down the plywood again wall and then fix it on both ends with the help of screws, and you are planning to build a brick wall.
Lay down the bricks against one another in a stack and put cement between the bricks and between the bricks and the wall to secure the frame of the bricks.
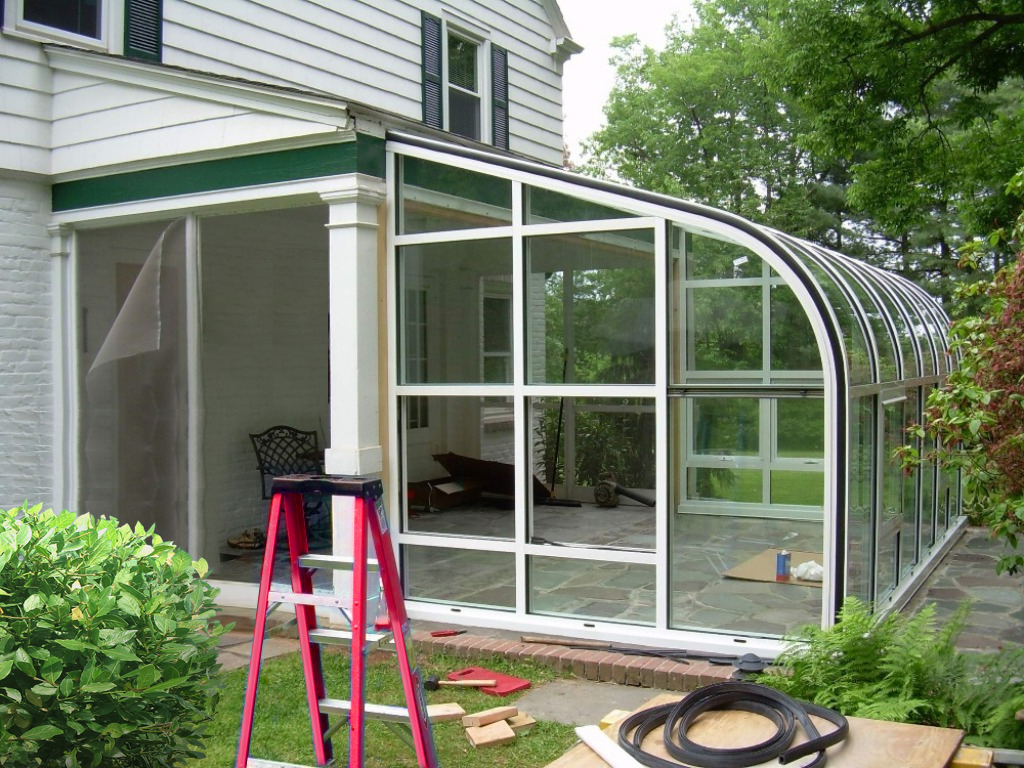
13. Place the Windows and The Doors
Now that the wall is ready, you must place the windows and doors in the framework.
Ordering a door or window from an expert will be easier, or you can build one yourself following easy tutorials.
Once the doors and windows are ready, place and screw them properly in the space that you have created for them.
14. Paint the Walls and Lay Down the Floor
Your gorgeous sunroom is almost ready. All you need to do is paint the walls and lay down the flooring.
Choose the flooring of your choice, be it wooden flooring or tiles, and then paint it up according to your choice.
15. Jazz It Up A Little, and You Are Done
Your sunroom is ready! All you need to do now is get your favorite lights and add a coffee table, a few comfy chairs, a couch, and maybe a bookshelf.
Decorate it and jazz it up, and you are set!
So that was all about building DIY sunrooms and how to make one for yourself with the help of a sunroom kit.
Final Thoughts
By embracing afforestation, we’re not just adding a touch of green to our urban spaces; we’re actively contributing to the health of our planet.
Testing the soil, choosing the right trees, and giving them the care they need might seem like small steps, but they lead to a giant leap for our environment.
As our mini-forest flourishes, it becomes more than just a cluster of trees—it’s a testament to what we can achieve when we put our minds (and shovels) to it.
Every leaf, every branch, adds to the chorus of life, improving air quality and offering us a serene escape.
So, let’s roll up our sleeves and turn those backyards into havens of biodiversity. Our mini-forests are not just for us; they’re our gift to the future, a breath of fresh air.
Ready to start your green legacy?