
We are all aware of the effects that sound can have on our mental and physical well-being. The soothing sounds of water running, chirping birds, or a crackling fire can be very calming for some people, while other noises such as construction work, noise from pedestal fans, traffic noise, and sirens create an environment that is stressful to live in.
This article discusses how you can hang felt sound panels to reduce unwanted noise levels, so you don’t have to worry about having a stressful living space. It also contains some instructions on how sound panels are hung and what materials you’ll need.
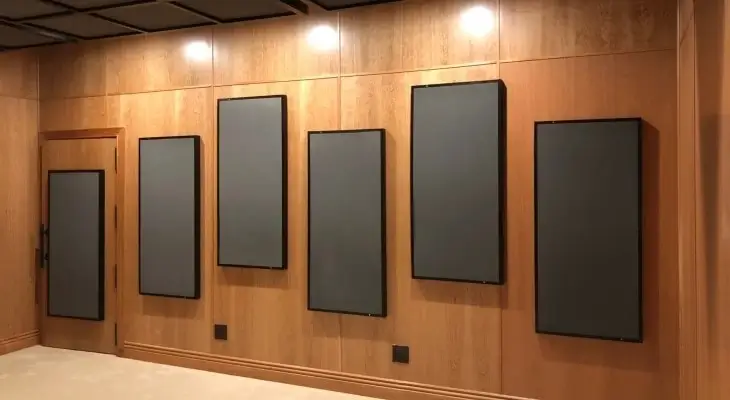
What Are Sound Panels?
Acoustic panels absorb sound waves and reduce the amount of reverberation and echo within a given space. You can either have vertical or horizontal acoustic panels, and acoustic panels use either absorption, diffusion, or attenuation to achieve the end result of sound reduction.
When Should You Use Sound Panels?
Vertical panels typically mitigate sound transfer from one room to another. They also aid in lowering background noise.
Horizontal panels are typically used for direct absorption. This means they can stop sound waves from spreading by converting the sound energy into heat through friction.
What Is the Difference Between Soundproofing and Sound Damping
The difference between sound damping and soundproofing is that sound damping only reduces sounds while soundproofing keeps sounds within a space and blocks others from entering the room.
Sound damping materials don’t stop outside sounds from entering the space. They merely diffuse it, so it doesn’t resonate as much. Soundproofing techniques are more invasive than sound damping techniques./
Measuring and Cutting the Acoustic Foam
If you’re using the acoustic foam for recording purposes, place it behind your recording equipment. Sound bouncing off the walls creates unwanted effects. Placing it behind the recording equipment reduces the reverberation in the recording.
If you’re using your acoustic equipment for general noise reduction, you can designate any spot in the room.
To measure, lay the acoustic panels on a flat surface and record the total length and width on a piece of paper. Then take the measurement tools off the wall.
Use an electric carving knife and not your more knives to give the acoustic panel the right cut. Next, hold the panel on the thin end and use the knife to cut through the acoustic foam.
Some acoustic panels come pre-cut and are even more straightforward,In addition, they than this to situate. Some come pre-cut in various designs and don’t require any additional tools to hang beside their adhesive tabs.
Hanging the Sound Panel Without Damaging the Wall
As mentioned above, some acoustic foam panels come with adhesive tabs. Others require adhesive spray to spray on the back to ensure they don’t ruin or damage your walls.
The Effects of Acoustic Foam
Acoustic foam isn’t intended to block sound from entering or leaving a room. It disperses dound so that the waves don’t reverberate and echo as much. The result is that you can create a more focused work environment and avoid potential distractions.
The noise reduction coefficient is a tool used to determine the amount of sound a room can disperse. For example, a foam might have a NRC of .35 – meaning the foam can reduce 35% of the noise occurring within the room.
Placing Acoustic Panels
Placing your acoustic panels depends on your personal preferences and your sound reduction needs. If you have an at-home office, you will need to consider where most of the noises occur within that office. You will also need to consider the creative elements of your office.
If you run Zoom meetings, you don’t want your background to be ugly and bulky with a bunch of sound proofing being the focal point. However, if you run podcasts in your office, you will probably need more extensive sound dampening solutions.
Materials You Need
The materials you need to hang acoustic panels will vary depending on the type of panel you purchase. Some acoustic panels only require adhesive tabs, measuring tape, and a level. Other, more elaborate acoustic panels will require materials such as lumber and powertools.
What Are the Most Commonly Used Materials for Acoustic Panels?
Porous Absorbers
Porous absorbers can be divided into two categories: fibrous material and open-celled materials. Fibrous materials absorb a sound by bending, dampening, and converting the sound into heat energy. They turn the sound wave into heat through friction.
Open-celled foam absorbers absorb sound by the air movement that occurs when sound waves pass through the passages of the material. The sound gets reduced because of the air within the passages and converts to heat.
Panel Absorbers
Panel absorbers or single absorbers are common building elements, such as tables chairs, windows, and doors. These absorbers primarily deal with bass frequencies
Resonance Absorbers
Resonance absorbers contain mechanical or acoustical oscillation systems with perforated plates. The perforated material ensures the material can lock and trap sound inside. Trapping the sound inside your panels will reduce echo and reverberation. Resonance absorbers are ideal for bass frequencies and they’re often made of sound reducing materials, such as foam.
Conclusion- How to Hang Sound Panels
Hanging sound panels is a great way to boost the audio quality in your home or office. The best part about hanging these panels, however, is that it’s so simple and anyone can do it. You can complete the installation in the afternoon and enjoy the sound benefits by nightfall.
Sound panels can go a long way to creating a more peaceful environment that fosters focus, creativity, and productivity. They are much easier to implement to your existing home design than whole soundproof tiles, and they don’t cost nearly as much.