
Have you ever seen the night sky and wanted to capture its beauty? Well, you’re in luck.
We are about to dive into the amazing world of painting, specifically focusing on creating stunning night skies.
It’s not just about slapping some blue and black on a canvas; there’s so much more!
From the blues and purples to the sparkling stars, painting the night sky is a fantastic way to bring a piece of that celestial magic into your home.
Whether you’re a seasoned artist or just picking up a brush for the first time, we will walk you through everything you need to know.
Let’s grab our paints and embark on this creative journey together!
Different Types of Art Supplies and Their Tutorials
The works of artists throughout the history of famous paintings have the night sky in existence.
There are so many differences in style, colors, aspects, etc., which are all very important to note so that it is easy to find your favorite art style.
Therefore, let us discuss the different types of art supplies that can be used and what type of canvas and/or paper to use with them.
1. Acrylic Painting (Beginner)
Acrylics are one of the main modes to make your work look picturesque.
Acrylic paint dries up faster and is soluble in water, and when it is dry, it can resist water.
Acrylic painting is a vibrant and versatile art form artists love for its quick-drying properties and flexibility.
Unlike oil paints, acrylics are water-based, making them easy to clean up and more environmentally friendly.
They can be diluted with water to resemble watercolor or applied thickly for an oil-paint-like texture.
Acrylics adhere to various surfaces, including canvas, paper, wood, and fabric.
Their ability to maintain color intensity, whether thick or thin, sets acrylics apart, and they don’t yellow over time.
This medium is perfect for experimenting with styles and techniques, from detailed brushwork to bold, abstract compositions.
Acrylics open up a world of creative possibilities, making them a favorite for beginners and professional artists.
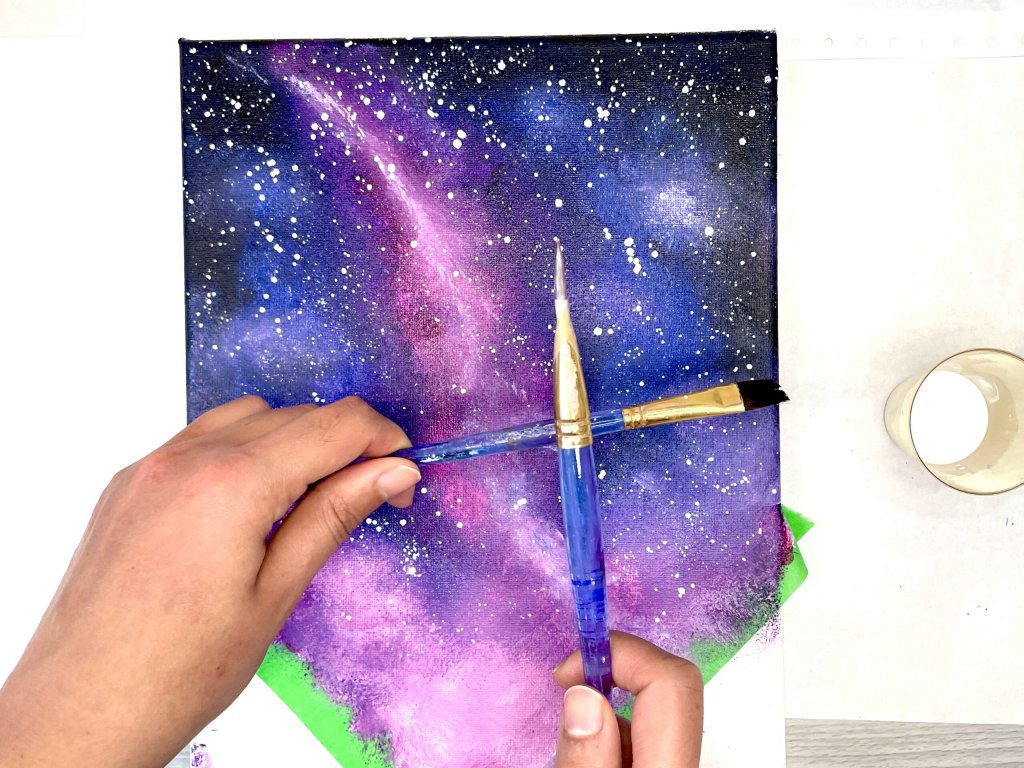
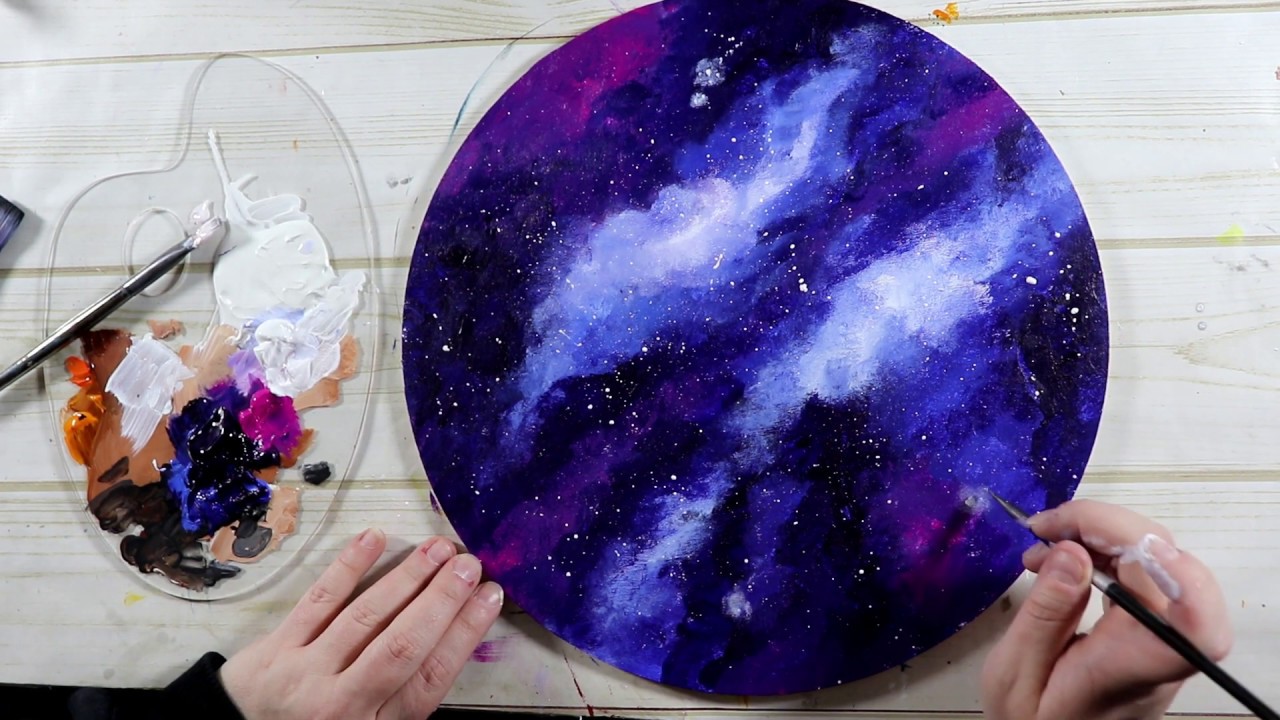
Blending Colors in Acrylic for a Night Sky
Materials Needed:
- Acrylic paints (Prussian Blue, Purple, Light Purple, Black, White)
- Square canvas (size as preferred)
- Brushes (varying sizes, including a broad flat brush and a fine-tip brush)
- Palette or mixing surface
- Water container
- Paper towels or rag
Step-by-Step Tutorial:
- Prepare Your Palette: Squeeze out a small amount of each color (Prussian Blue, Purple, Light Purple, Black, White) onto your palette. Keep a cup of water and a paper towel handy to clean your brush between colors.
- Start with the Sky: Begin at the top of your canvas. Dip your broad brush into Prussian Blue and apply it to the top portion of the canvas using horizontal strokes. Cover about one-third of the canvas from the top.
- Introduce the Second Color: Apply some Purple paint below the blue area without cleaning your brush. Use light, horizontal strokes to apply the color, overlapping slightly with the blue.
- Blend the Colors: While the blue and purple paints are wet, gently blend them at the junction. Mix the colors with a clean, slightly damp brush and light strokes, creating a smooth transition. Avoid over-mixing to prevent the colors from becoming muddy.
- Add Light Purple: Use horizontal strokes to clean your brush, and then apply Light Purple below the purple section. Blend it upwards into the purple to create a gradient effect.
- Incorporate Black and White: Use a small amount of Black mixed with Purple for depth at the bottom of the canvas. Add a touch of White near the horizon line to create a glowing effect. Blend these colors gently into the existing layers.
- Create Stars: Dip an old toothbrush in white paint once the background is dry. Flick the bristles over your canvas to create stars. Vary the size and concentration of stars for a more natural look.
- Detailing: Use a fine-tip brush to add specific highlights or details, like a brighter star or a crescent moon.
- Finishing Touches: Once satisfied, allow the painting to fully dry. You can add silhouettes of trees or landscapes at the bottom for more depth.
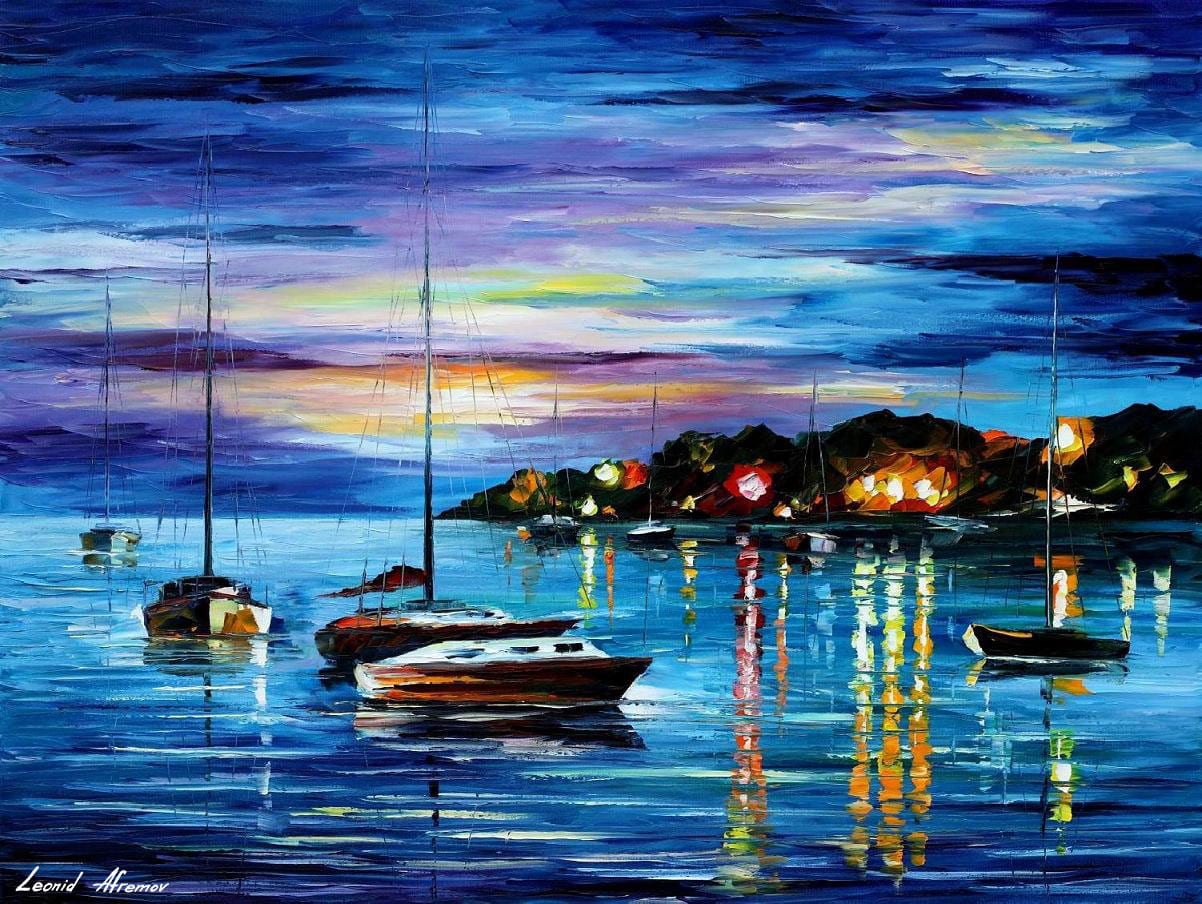
2. Oil Painting (Intermediate)
When using oils while painting, you must make sure you have your preferred shades of colors, which are several in number.
Simplifying our palettes before starting is very important in this procedure, and it is a great choice if you use a big canvas for the night sky painting.
Prepping the canvas in comparison to the mixture of colors and the reflection of the lighting is also another way to make the painting look exquisite.
The palette and the canvas should receive the same light or darkness in the room where you are creating it.
Having a reference while painting something on a canvas as big as this one is always a great idea.
You can go outside and set up there or click some beautiful landscapes at night, as it can be helpful to give a full picture of how your work will look.
Oil Painting a Night Sky
Materials Needed:
- Oil paints (choose a range of blues, whites, black, and optionally some purples and yellows)
- Canvas (size as preferred)
- Brushes (various sizes, including a broad flat brush for large areas and finer brushes for details)
- Palette or mixing surface
- Odorless mineral spirits or turpentine for thinning paint and cleaning brushes
- Linseed oil or a medium of your choice
- Rags or paper towels
- Palette knife (optional for mixing paints)
Step-by-Step Tutorial:
- Prepare Your Palette and Workspace: Squeeze your chosen colors onto the palette. Ensure your workspace is well-ventilated due to the fumes from oil paints and solvents.
- Background Layer: Start by creating the background of your night sky. Use a broad brush to apply a mix of dark blues and black. Cover the entire canvas, creating a deep, dark base. This will be the foundation of your night sky.
- Adding Depth with Darker Tones: While the first layer is still wet, enhance the depth of your sky by adding darker tones. Mix in a bit more black with your blue and apply it, especially towards the corners and edges of the canvas. This technique, known as ‘chiaroscuro,’ will dramatically affect your sky.
- Creating the Starry Effect: For stars, you can use a fine-tip brush or even the end of a brush handle. Dip it in white paint and dot your canvas to mimic stars. Vary the size and concentration for a more realistic look. You can also create a soft glowing effect around bigger stars or the moon by gently blending white paint.
- Painting the Moon: If you wish to include a moon, start with a circular shape using a light gray or pale yellow. Add layers of white and a hint of blue for a glowing effect. Use a clean brush to softly blend the edges into the night sky, creating a halo effect.
- Adding Layers: Oil paint allows you to build up layers. Once your initial layers are dry (which might take a day or two), you can add more details, such as clouds or a gradient effect in the sky, by applying thinner layers of paint.
- Refining Details: Use a finer brush to add any final details. This could include brighter stars and constellations or enhancing the moon’s luminosity.
- Glazing for Depth: After the painting is dry to the touch, you can apply a glaze (a thin, transparent layer of paint) to enrich colors or add subtlety to certain areas of the painting.
- Drying and Curing: Allow your painting to dry thoroughly. Oil paintings take longer to dry than water-based mediums, so be patient. The painting may take up to a few weeks to dry completely.
- Final Touches and Varnishing: Apply a varnish to protect and enhance the colors once the painting is fully dry.
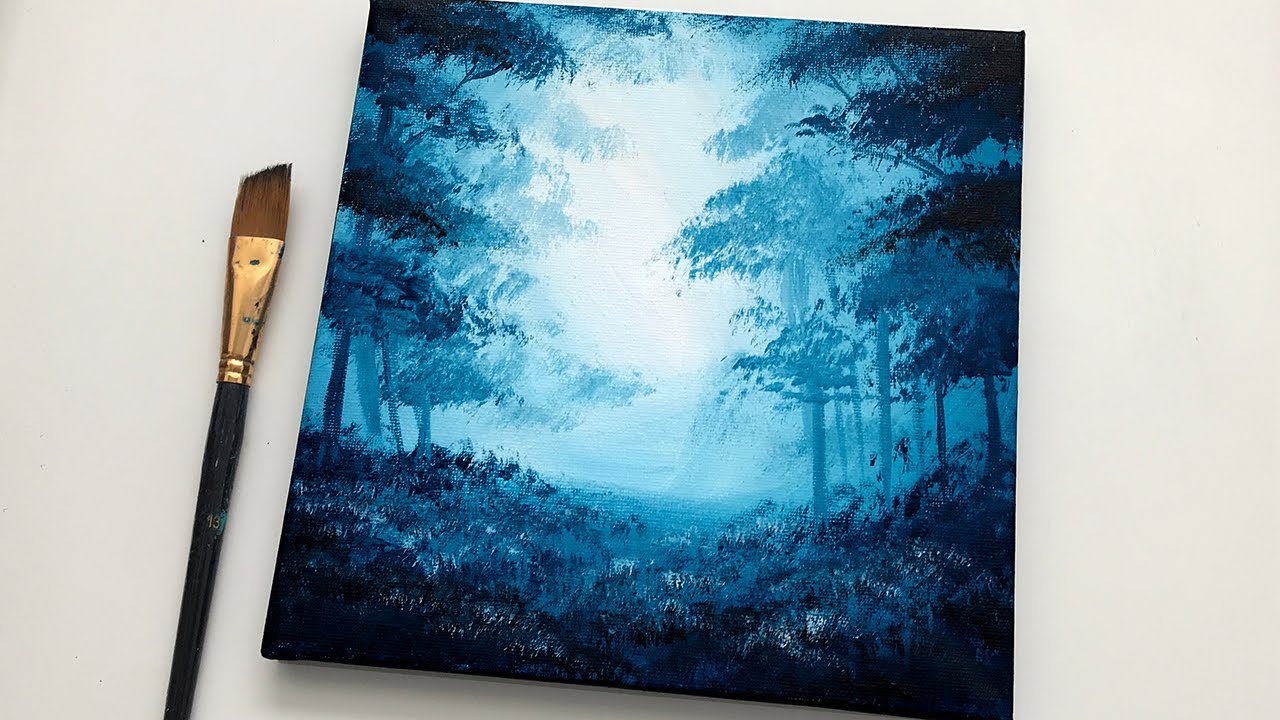
3. Watercolour Painting (Advanced)
Using the medium of watercolors is said to be hardest compared to acrylics and oils because we are using water, and this could go any way that we cannot predict.
The trick is to work faster on your painting than any other medium, as mixing colors when it is still wet will help the painting look good in the end.
The best way for the painting to work is the wet-on-wet technique, which many artists use when using watercolors and other mediums.
Always use the right watercolor paper so that it does not ruin the painting, and you can easily do the wet technique.
Using normal paper instead of 200 GSM paper will collapse, unlike the right paper, which helps absorb the paint and water together.
A masking tape is another important material when you are just a beginner, which helps keep your work from being spilled away if you use excessive paint or water.
It also helps keep the sheet in good mobility and stabilized. The tutorial is for a beginner who thinks you cannot paint with watercolor.
Using Dark Shades in Watercolor for a Night Sky
Materials Needed:
- Watercolor paints (Dark Blue, Violet, Indigo, Black)
- Watercolor paper (preferably 300 GSM)
- Brushes (including a broad flat brush and a fine-tip brush)
- Water container
- Masking tape
- Paper towels
- Optional: Salt, rubbing alcohol
Step-by-Step Tutorial:
- Secure Your Paper: Use masking tape to border the edges of your watercolor paper. This not only prevents warping but also creates a clean edge.
- Wet the Paper: Using a broad brush, wet the entire surface of the paper with clean water. The paper should be uniformly damp but not overly saturated.
- Apply the First Layer: Apply a wash of Dark Blue with a large brush. Start from the top and move downwards, leaving some areas slightly lighter to represent areas of lighter sky or distant clouds.
- Introduce Darker Shades: While the first layer is still wet, introduce Violet and Indigo, especially towards the top, to depict the depth of the night sky. Allow the colors to flow into each other, creating a natural blend.
- Adding Depth with Black: Dilute Black with water and add it sparingly to the top of the sky and near the edges. This adds a sense of depth and contrast. Use a clean, damp brush to blend it gently into the other colors.
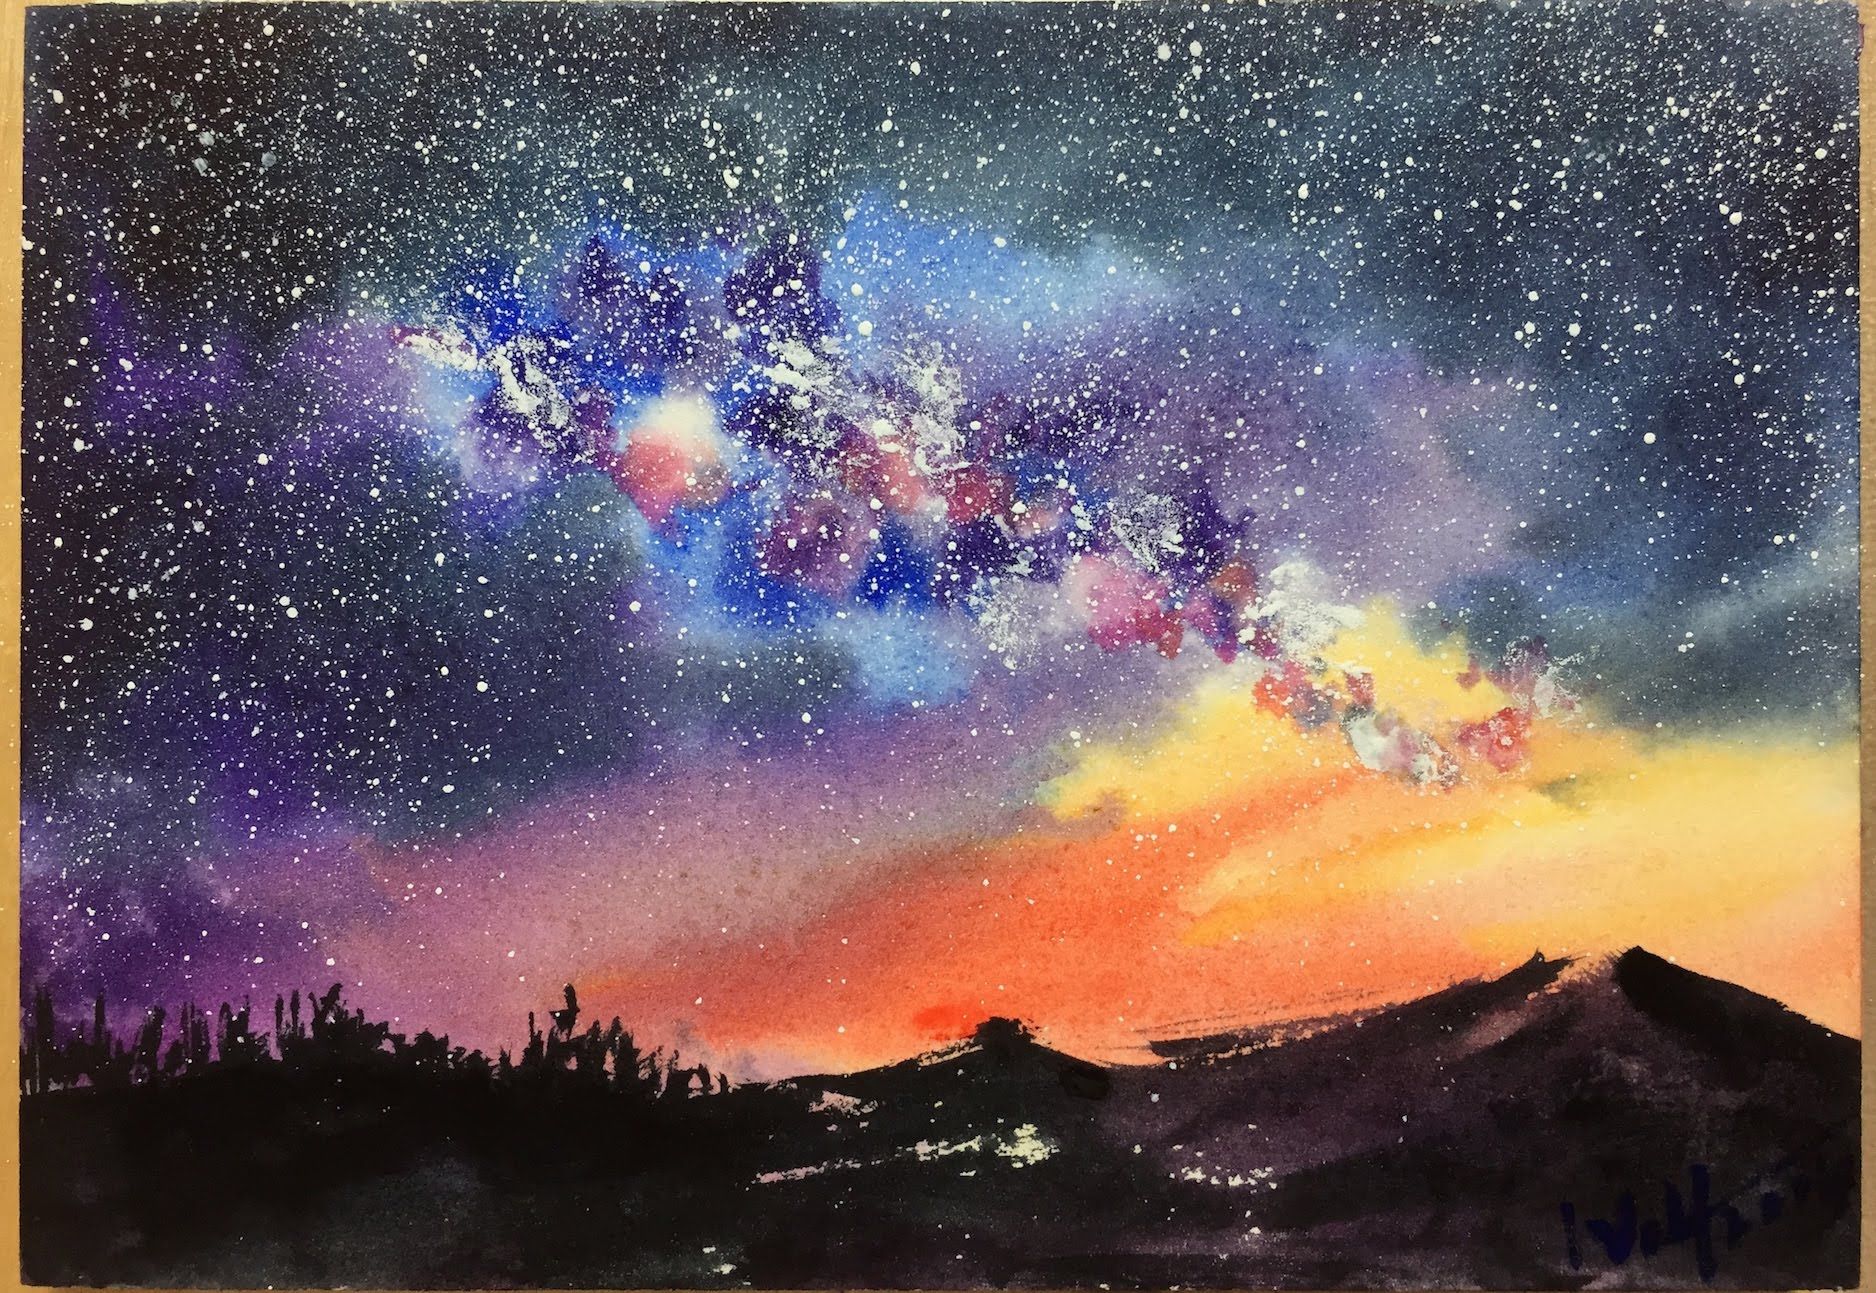
- Creating Texture: For a starry effect, sprinkle a small amount of salt or drop rubbing alcohol onto the wet paint. This creates interesting textures and patterns.
- Stars and Moon: Once the background is dry, use a fine-tip brush to paint stars and a moon. For a glowing moon effect, paint a light wash of Yellow or Light Blue and then outline it with a thin ring of White.
- Final Details: Add any final touches, such as silhouettes of trees, hills, or other elements, to the foreground using a darker shade.
- Remove the Tape: Once the painting is completely dry, carefully remove the masking tape to reveal your finished artwork.
Different Types of Art Styles
Under this title, we can discuss some of the main art styles many artists use to paint and express their art to people.
Let us use the medium of a night sky for each of these so that it could also be a reference for you when creating a night sky painting for yourself.
We can use the famous painting of Vincent Van Gogh, The Starry Night, to reference and explain each style.
1. Abstract
An abstract painting means detaching something from another and having a separate identity.
The abstract also means that a painting does not attempt to portray realistic expectations but is showcased by using shapes, marks, colors, etc., to show its specialty individually.
This term can be applied in art and the image of objects and landscapes where we can help simplify the mentioned item.
This style is often said to be simple and strictly in order.
When creating the starry night using the abstract art style, you must remember the art is already moderately abstract.
Except for the landscapes, trees, and everything you can depict, which are not separate objects.
While painting this, you can focus on giving the art some detailing where each part of the painting is recreated and created in a way that it is in order.
The most important part of the starry night is the swirling wind.
The uniquely created stars and the moon, so creating abstract work using these colors, wind, and stars is a great idea.
2. Realism
Realism is a term that was created in the 1840s and was created for the first time as an artwork by the painter Gustav Courbet.
Realism’s art style is simply a depiction of artwork just like everyday life and is also called naturalistic.
When you practice this type of art style, the subject of depiction is numerous, and it is meant to be the normal scenes of people’s daily lives.
Initially, the art was created to showcase the experiences of the peasants and the working classes and how their lives were.
It gradually showed the lives of every class and the life of people in cities, cafes, the human body, and even the matter of treatment and sexualities and the sexual activities of people, to speak frankly.
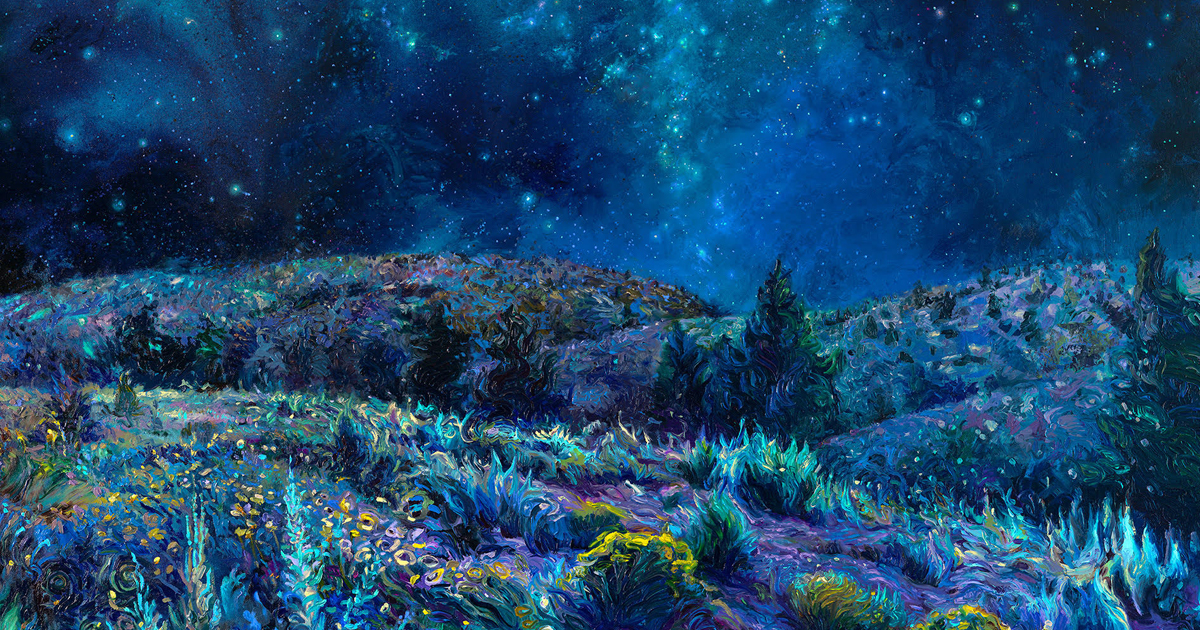
To make the painting completely realistic, we can paint the night sky so that people can familiarise it with the normal, beautiful night sky we see every night.
Although you would think it sounds plain without the jaw-dropping color palettes used in Vincent’s painting.
If you watch how the night sky changes colors and the number of stars creates pretty patterns, you can produce it on paper as beautifully as it is in real life!
Final Thoughts
In conclusion, painting a night sky can be a wonderfully rewarding experience, whether you’re a seasoned artist or just starting.
Through the detailed tutorials for acrylic and watercolor painting, we’ve explored how to blend colors and use dark shades to bring the beauty of the night sky to life on canvas.
Remember, the key to a great painting is patience and practice. Don’t be afraid to experiment with different techniques and colors to find what works best for you.
Each stroke adds to your experience and skill. Most importantly, have fun with it!
Whether it’s the blues and purples of a calm night or the contrasts of a moonlit scene, your rendition of the night sky is unique and a reflection of your artistic journey.
Keep painting, and let the stars guide your brush!