
Art is nothing but the expression of feelings and emotions. That is why there should be nothing like the perfect technique or a way of doing it. It should be ultimately your way to do it as you like and love. You will find a lot about how painting the sky and painting clouds should be done as a procedure. That is it. It should not be a procedure. It should be as you like it and feel it.
It becomes difficult for beginners or even for experts sometimes to know how painting clouds should work exactly.
Various methods or techniques can paint clouds. Being an artist is unique. Then, of course, your art should follow the same, shouldn’t it?
Here we have tried to sum up some of the basic steps and techniques used by both beginner and expert artists that you need to know for painting clouds as quickly as possible without getting confused with the right sized brushes or suitable types of paints.
First things First
What are the materials you need?
Just the paints (whichever you prefer, be it watercolors or acrylics), brushes, a paper, or a canvas on which you would like to create that masterpiece.
If you ask about the brush specifically, we must say that you can use any brush, to be very honest. It would help if you were comfortable using it. If available, I prefer to use a round brush which is mainly used for painting clouds.
Also, keep a pencil and rubber handy, trust us when we say you will need it even if you are painting with the paints.
Let us begin with different approaches for both watercolors and acrylics.
Painting Clouds with Acrylic Colours
Step 1. Paint the background.
First, paint the background. When using acrylic, remember they are opaque. So, do not think that it will later mix with the clouds.
Whatever you are painting, whether a scenery or a simple sky, adding the background first helps to set out a base for adding colors further.
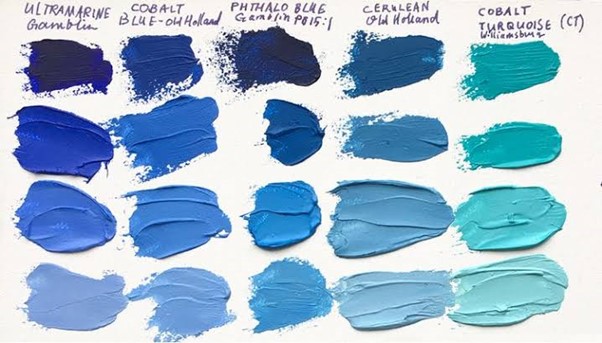
Use the shades of blue and white to paint a beautiful background of the sky. You can use light shades of blue or can make one by mixing ultramarine blue and white.
Step 2. Blending (skip if you already know)
Blending is easy when you know the trick.
Use wet-on-wet technique. This is the simplest way to blend. But it would help if you were quick as once the paint dries, it would not work. Try following this way as a general way of blending.
Some general steps for blending:
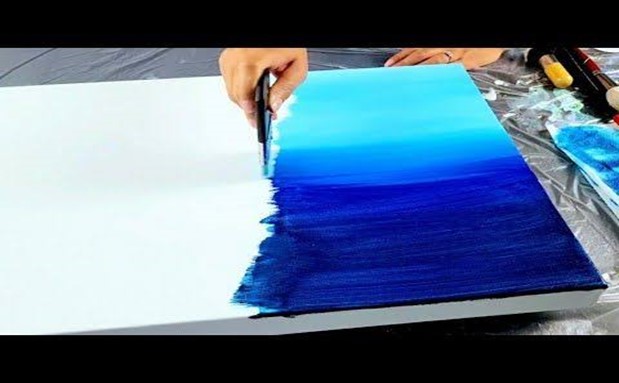
- Use a brush with a broad surface so you can cover much space at a particular time.
- Take the canvas. Start by painting the darker shade. For example, if you are using white and blue for the sky. Start with blue.
- Use a damp brush. It should not be dripping wet. Start painting blue from the top. Stop at the middle or a bit lower.
- Use the same brush without washing it for painting the second colour. Start where the first layer ends.
- Mix well the two colours where they are meeting.
You can dry paint as well if you are more comfortable in doing so.
Step 3. Use a pencil.
Now, once you have painted the background and it has dried completely, use a pencil very lightly to make the shapes of clouds wherever you want them to be. That is the trick.
Use the pencil very lightly. It will give you an outline to follow while using the paints. That is how you will not end up creating weird shapes in the name of clouds.
Look at some easy outlines of clouds you will want to paint from Google and draw them with pencil. If you make a mistake you can correct it with a rubber. But once you use paints you cannot do the same with them. Hence, use this simple trick.
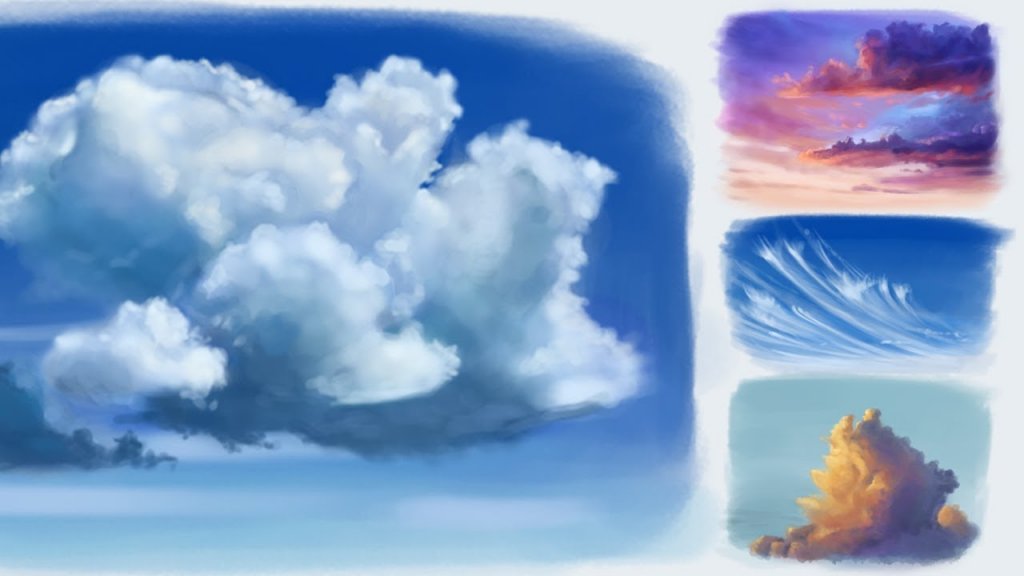
Step 4. Paint the clouds.
Use dry paint for this one. Take white colour on your brush and start filling in that drawing. You will have a white cloud. This will work as the base. Pencil outline will be covered once paint gets on it; if not, you can erase them carefully later when the painting is complete.
Step 5. Add shading.
Once you are done with the base, it is time for adding some shades to those clouds.
Use grey or a bit of darker tone such as rosy, white, for shading.
Use a different brush for this. Add a little colour, wipe off the extra. Gently add the colour to the underside of the clouds. This will give them layer and depth creating a good effect. Make clouds smaller when you want to show them at a distance.
You can also use pencil colours or pastels for giving shading to the clouds.
Step 6. Add highlights.
You can do this optionally if you want to make your clouds look more real.
Adding highlights involve using lighter tones than the base colour. Just take some colour in a different brush and add a little bit on the areas where you want to throw light on.
Adding highlights is an impressive way of showing more light balance in the painting giving out a better finish.
You can also use pencil colours or pastels for highlights in your clouds.
Painting Clouds with Watercolours
Pro tip: Be quick while working with watercolours because they dry quickly and once dried, you will not be able to add and merge colours. It will stand out and the painting will not get a good finishing. Hence, keep ready with all the colours, brushes and water you need in advance.
Step 1. Make outlines.
Watercolours are transparent colours. So, make outlines of clouds with pencil already before starting with the paints.
This will give you a fair idea of the spacing and sizing in your painting.
Step 2. Dampen the canvas.
Start by lightly dampening the canvas you are working on. If you are using a paper for painting with watercolours, make sure it is not too thin or it will completely get soaked in water.
Step 3. Start with the background.
Start with the background first, that is the sky you are making. Add a bit of yellow or green or whichever colour you would want to use in the sky, at the bottom of the canvas.
Now take the shade of blue you are going to paint your sky with. Watercolours after drying become light, therefore use a darker shade of the colour you would want to paint.
Paint the colour across the top of the canvas. It will get lighter with going down.
Keep doing this and add lighter layers at the bottom.
Step 4. Painting Clouds
Take a different brush or wash the one you are using and dry it completely. Now, dab the brush across your outlined clouds. The colour will be picked up by the brush leaving white areas on the canvas giving out the shapes of clouds.
Once the brush has absorbed the paint, wash and dry it again.
Step 5. Adding shades and highlights
Use the dried brush for shading the clouds. Take some grey paint and roll it over where you want to create the shading effect.
Do similar while highlighting. Be very careful while doing this. Add a lighter shade to the areas where you want to show the light.
You can always use pencil colours later when the painting has dried completely to add shades and highlights. Many times, we are not not confident enough to add shading and highlights to our painting thinking it might get destroyed if we are not careful enough.
In such a case, you can always skip the shading and highlighting part for later and get it done with the pencil colours or light pastels. It is a safer option for giving your painting an incredible finishing without the risk of spreading paints or uneven pigmentation in the final work.
Painting Clouds with Oil Paints
Painting with oil paints is a bit of an expert level job. That is why we have not included a thorough guide of oil colors in this but a brief one. So, if you are a beginner, get comfortable with acrylics and watercolours first. Once, you have got the trick you can switch to oil colours. Although painting is all about expressing, we, you still need to get a hold of the basic painting techniques before switching to oil paints.
If you are already accustomed with other paints and painting techniques, you can use oil paints for painting clouds with the same steps used while painting with acrylics and watercolours just with a bit of difference. Here is how:
Step 1. Paint the background and let it dry.
Step 2. Create outlines of clouds with white colour.
Step 3. Fill in the outline of the clouds with lighter colour. Work in circles.
Step 4. Use the background colour to add patches in the clouds to give depth.
Step 5. Finally, add highlights with cream or off-white colour.
DIY Ideas
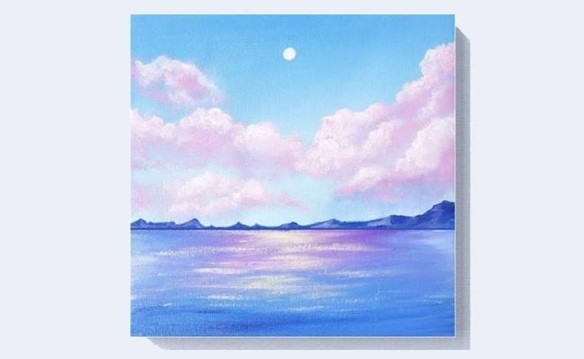
- You can paint a beautiful painting of the sky full of clouds on a canvas and put it on the shelf or frame it and hang it in your room.
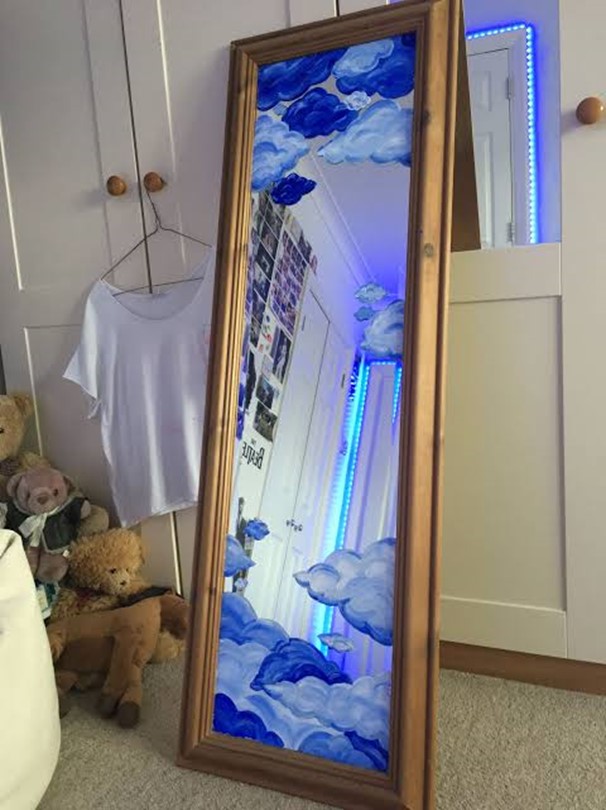
- You can use this guide of painting clouds for making designs on any surface like decorating that jewellery box or painting your wardrobe door.
- For your next room makeover, try considering a big picture of clouds on your wall. You can paint the clouds on a blue painted wall. It should not take more than a day or so.
Painting clouds should not be a difficult job. You can also practice on rough pages before you paint the actual canvas. It would give you an idea of how to do it and in case you commit a mistake, you do not have to worry as it was just another scrap paper! Paint it once you have been fairly impressed with the rough version. You will be more confident then eventually ending up creating a masterpiece.