
It is a beautiful experience in the backyard if those tiny and adorable hummingbirds visit. Their cute size, melodious chirping, and the way they just hang still in the air at times just look magic. The bird usually looks for flowers with nectar in them. That is what they feed on, how they survive. Therefore, a mixture of water and sugar in an appropriate amount can work as a substitute for that. That mixture is what is kept in a hummingbird feeder.
Many people keep a hummingbird feeder in their garden just to attract these tiny creatures and make them stay longer in the garden. These feeders can be bought from the market, or online. However, these feeders need to be cleaned from time to time, and that cannot be neglected. If not cleaned regularly, there can accumulate dust, dead insects as well as alive ones in the nectar, and other things which can make the solution bad for the birds.
How to clean them? Follow the steps below to learn:
Things Needed Before Starting the Cleansing Process
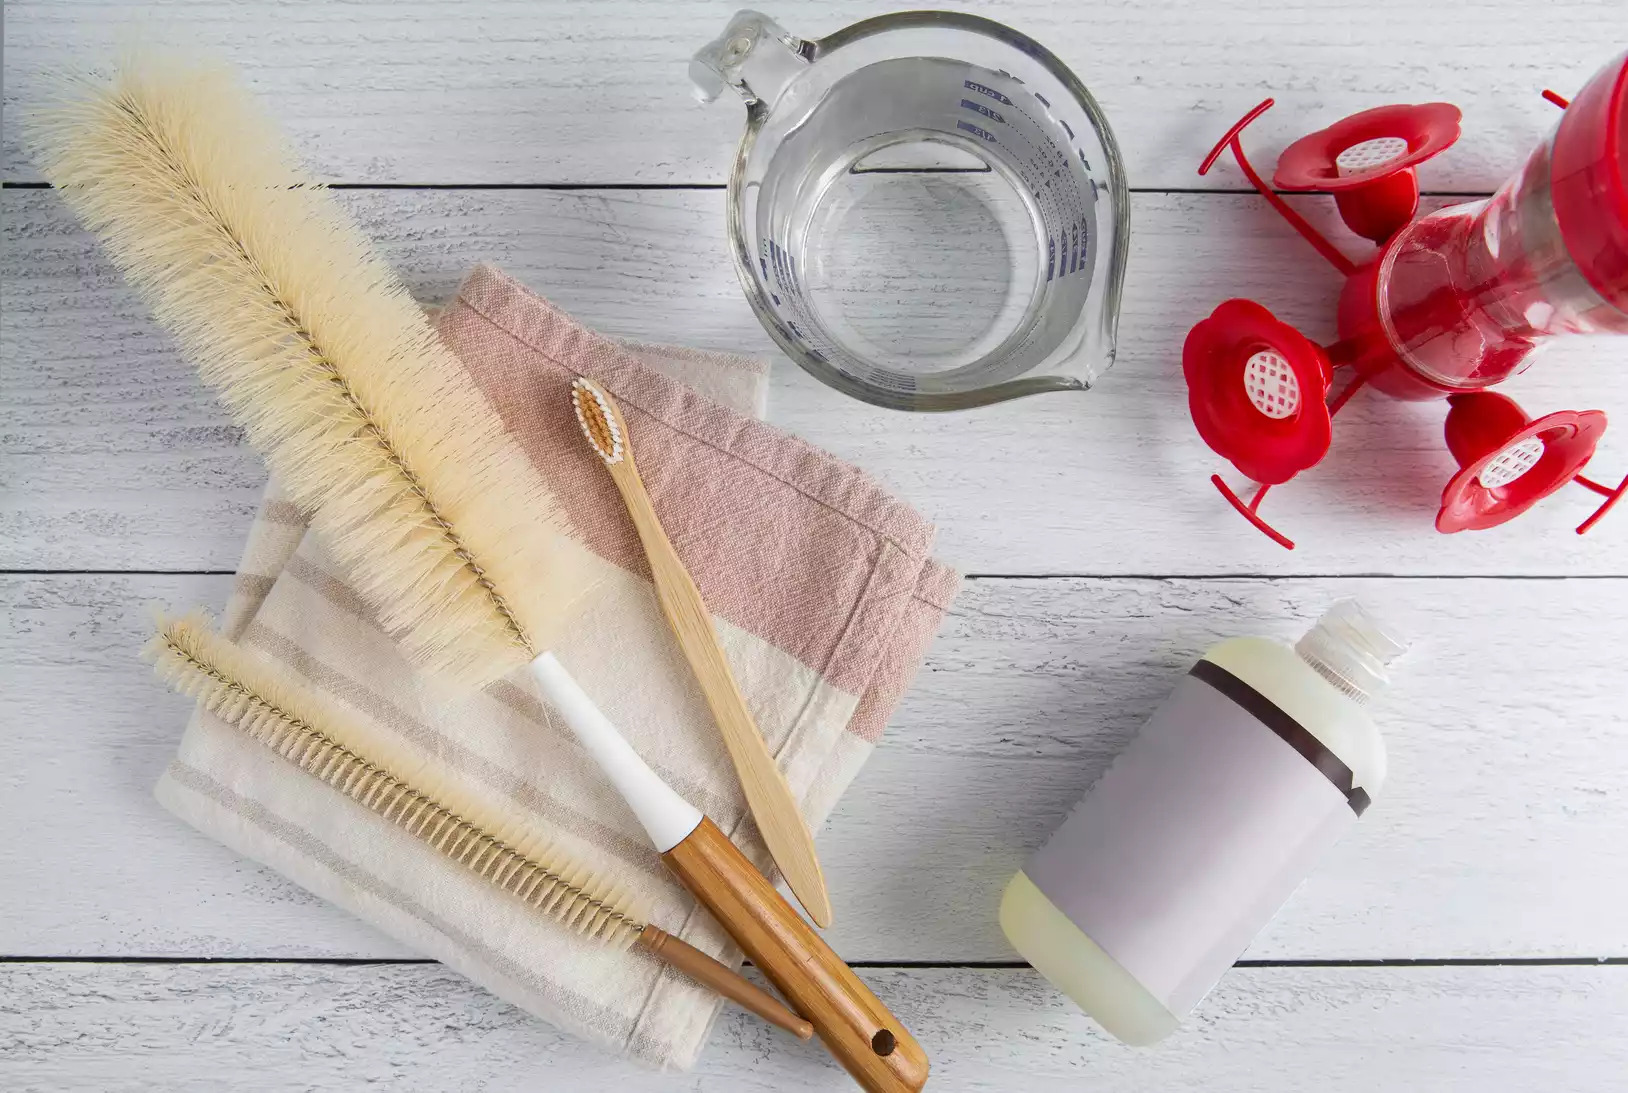
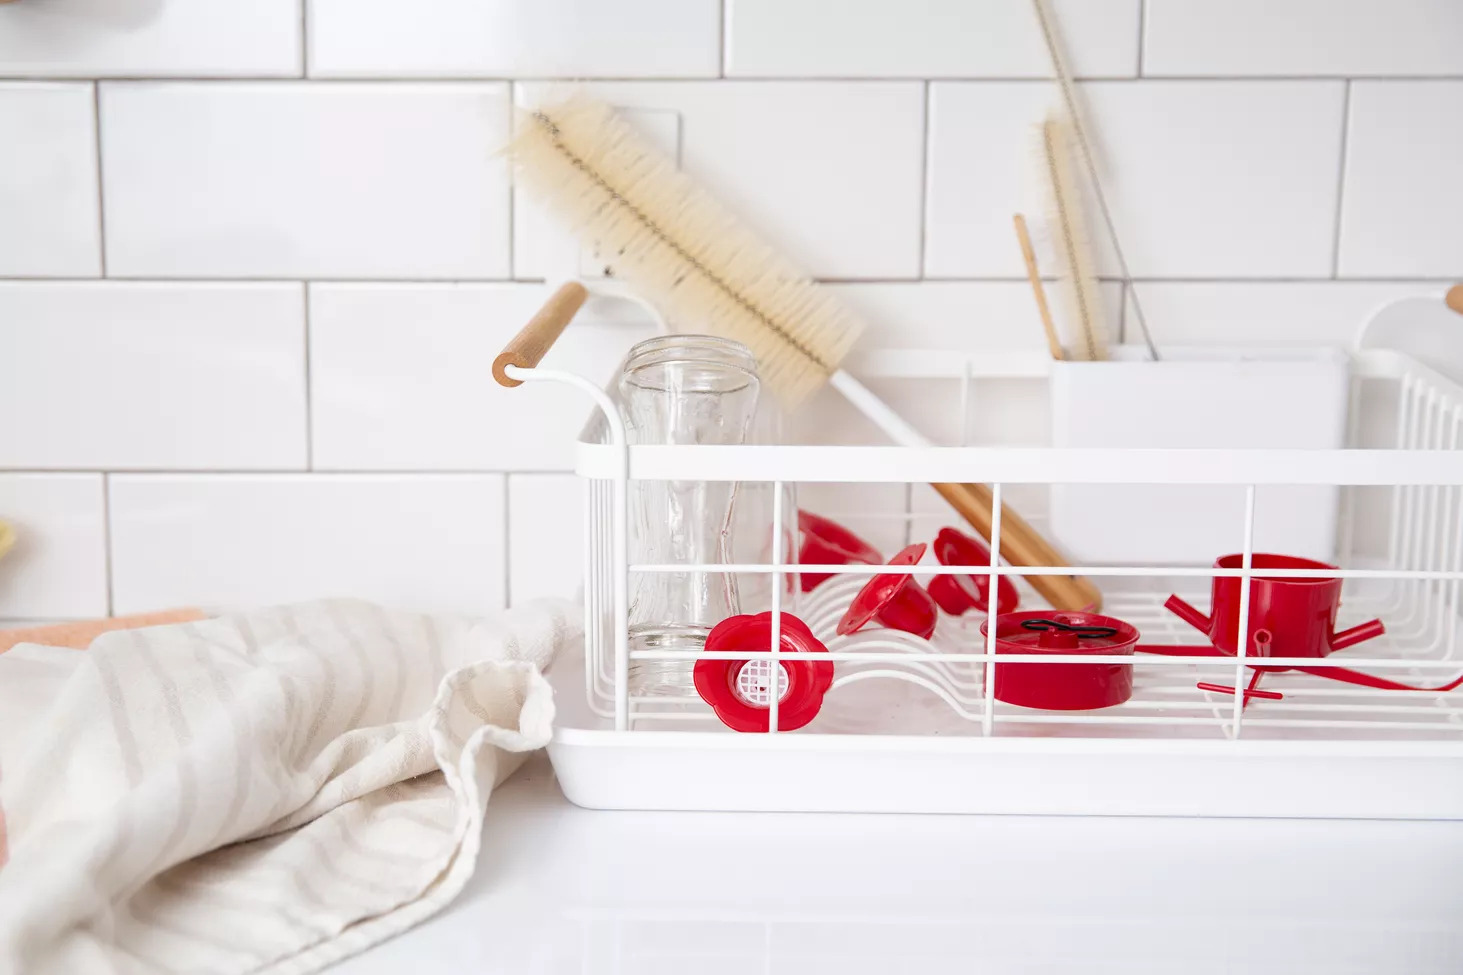
- A bottle cleaning brush
- A toothbrush
- Dishwashing solution or soap
- Clean tissues and a towel (not mandatory)
The image attached already shows all the things for reference.
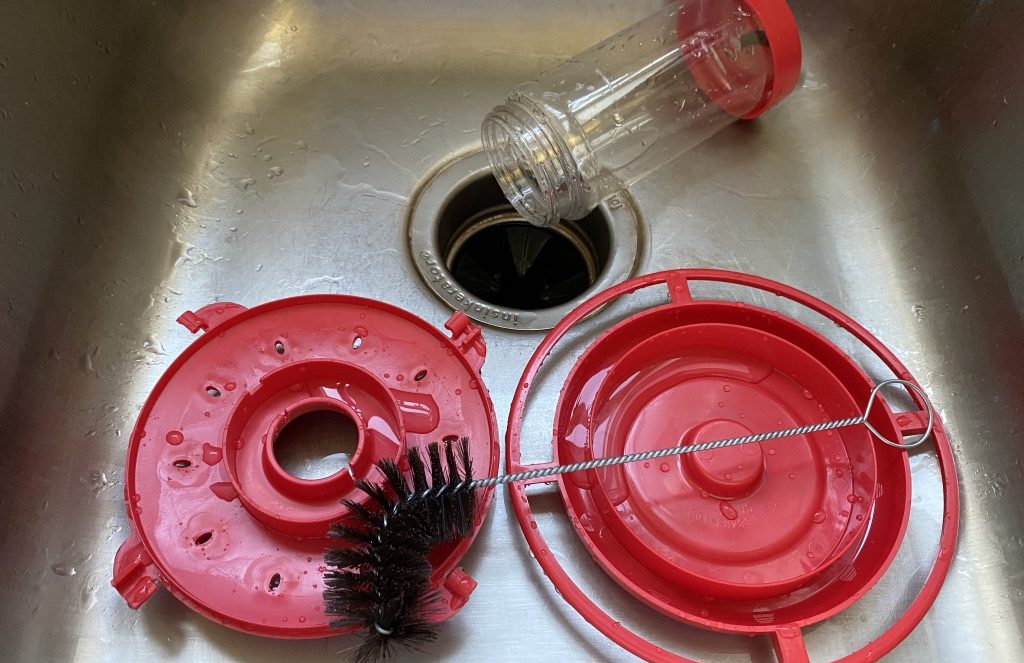
First Step – Take the Bird Feeder Apart

This step requires patience, to not end up damaging the hummingbird feeder when attempting to disassemble and clean it. Most of the detachable parts are distinguishable on a feeder and can be easily found, and detached. The Feeder should have a Jar or Reservoir, a Base, Ports or Feeders, and Ant Moat and Insect Guards.
Sometimes, the main portion that stores the nectar, the nectar jar, does not easily open. That can be because of the solution inside it forming crystals inside it that jams the base. In that case, keep the feeder in hot water for around 20 minutes, to dissolve the crystals. Then try opening it, it should work. However, do not forcefully open anything if it does not work.
Moving on, remove the other parts such as the insect guards and the ant moats.
The insect guard usually prevents most of the small and mid-sized insects from entering the feeder, and the ant moats are to stop any ants from reaching the hummingbird feeder.
After disassembling the feeder, time to proceed to the next step.
Soaking
If the feeder opened up easily, that means there was no necessity to soak it for that purpose. However, the hummingbird feeder should be soaked in a hot water solution for more than an hour or so. This will soften up the crystals and nectar residual inside it.
Doing this will help make the other steps easier and more efficient.
Draining

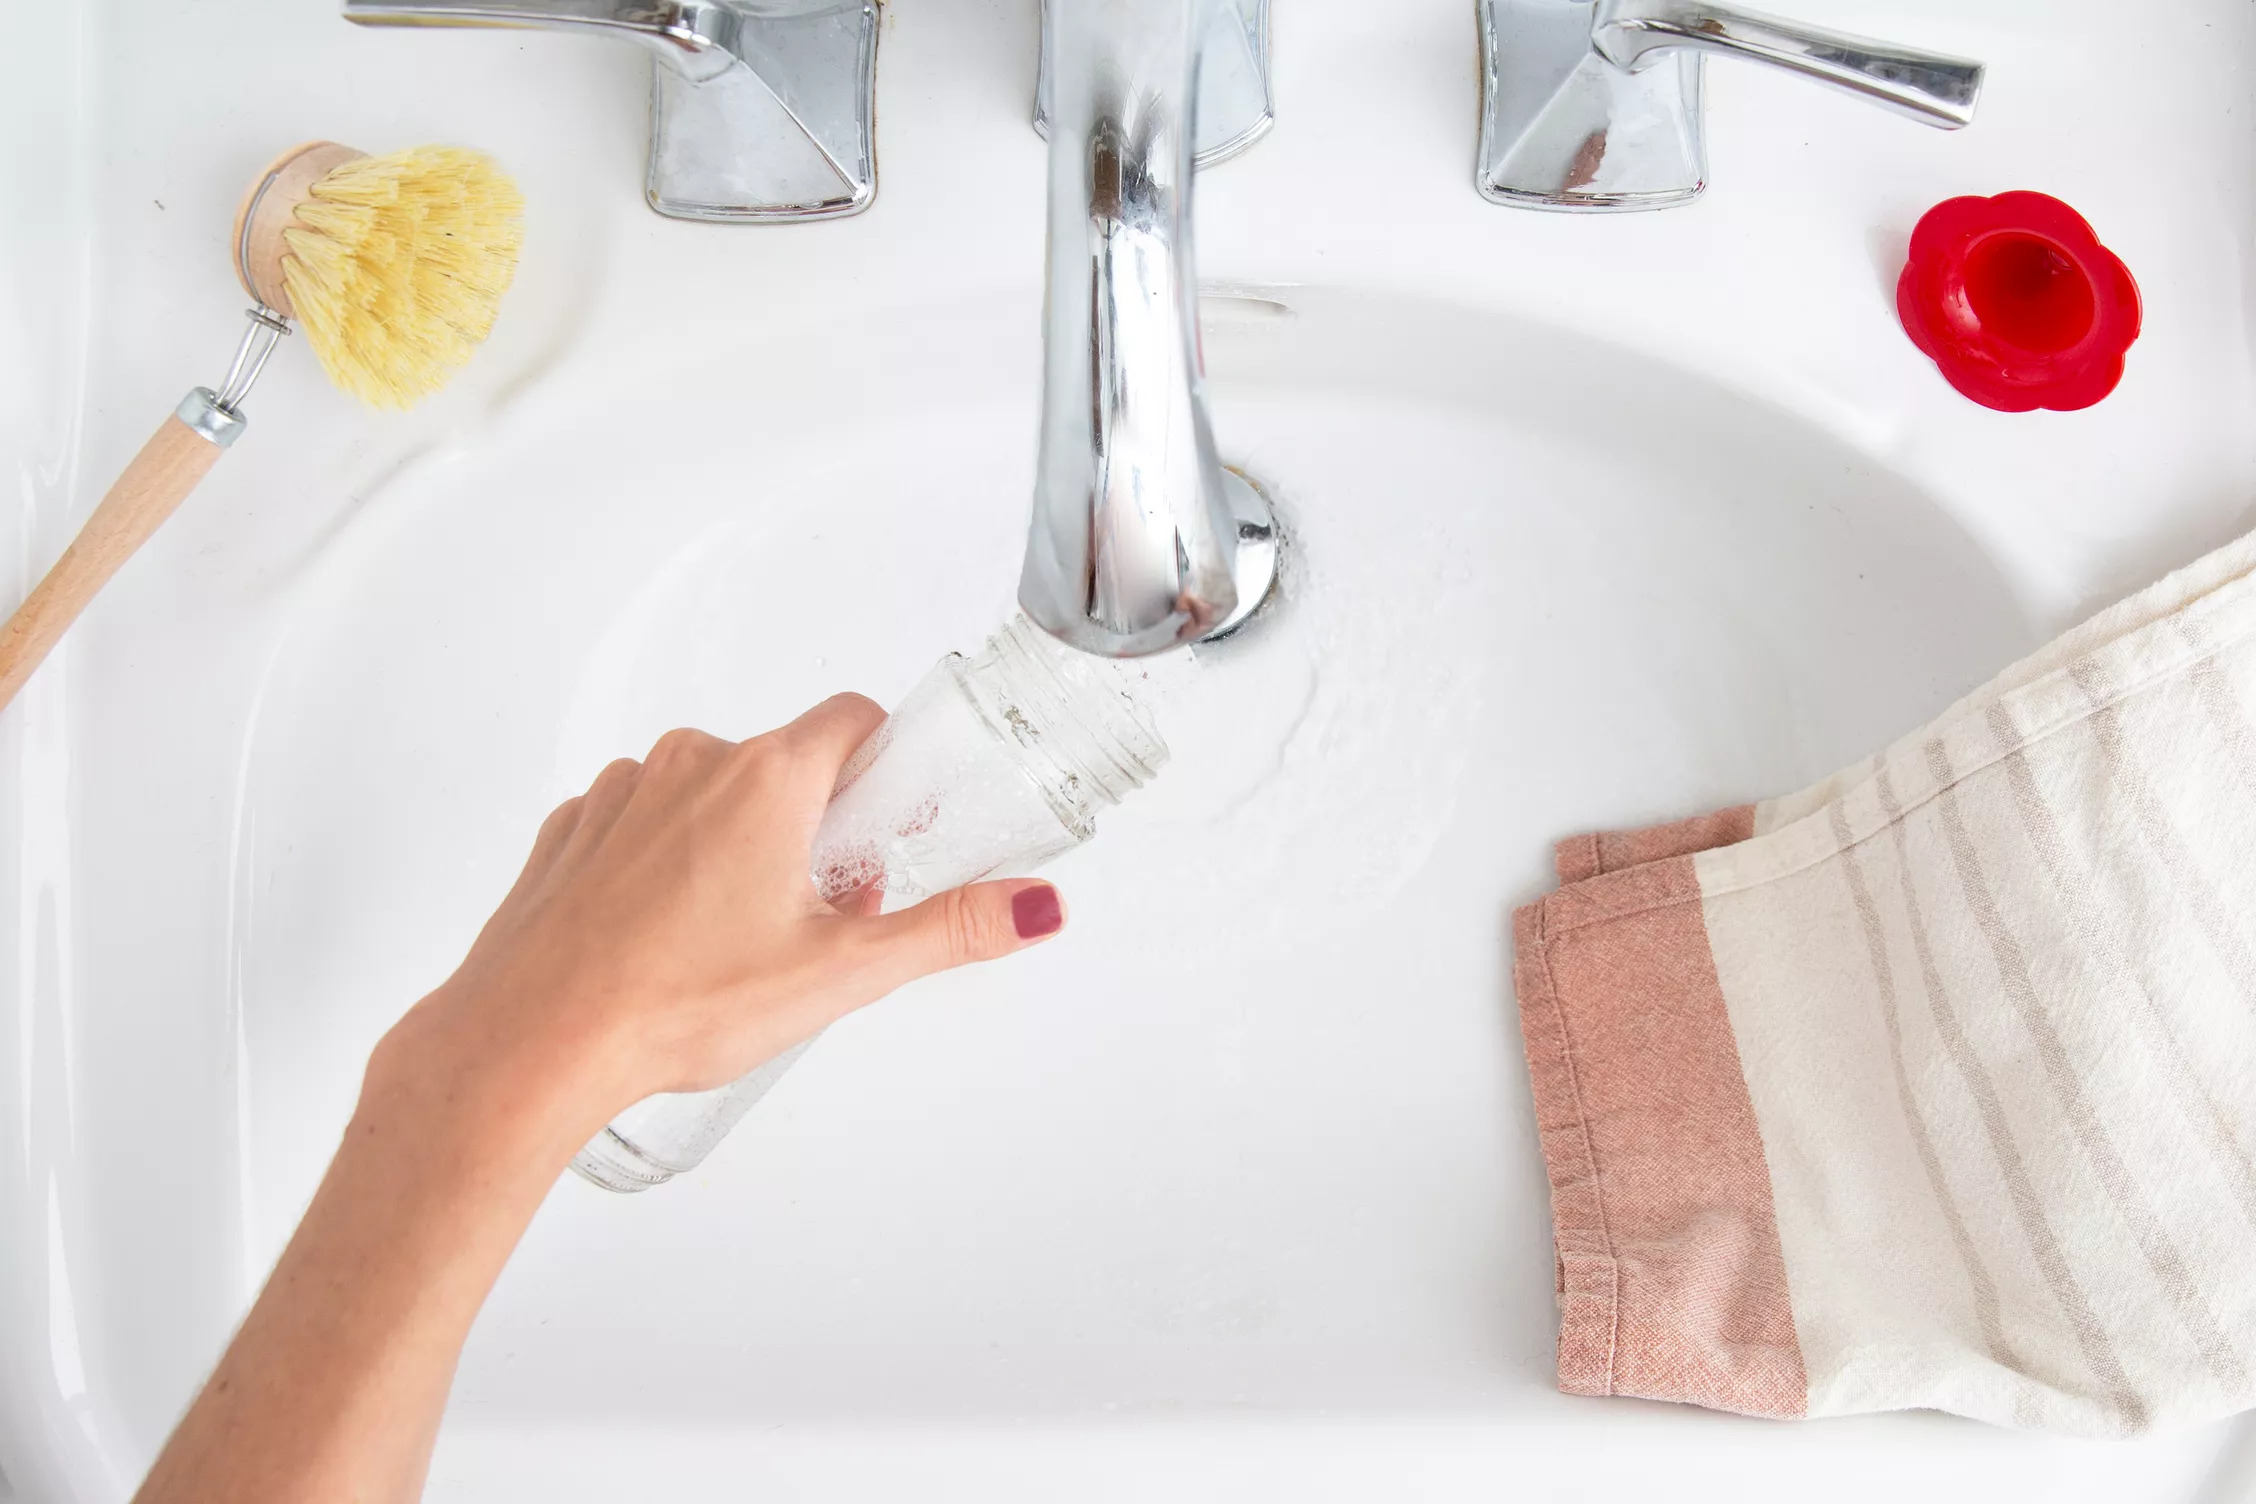
First and foremost, to clean the Nectar Jar of the hummingbird feeder, the old solution or nectar needs to be drained out. It can be done in a kitchen sink or outside in the garden. Be sure to drain it carefully, because if it is spilled somewhere on the floor or any other surface, it will attract ants and other insects. That will only increase the workload eventually.
Pass some water through the jar where the nectar or solution was. Pass some water also through the feeder’s other parts to rinse it off of any remnant liquid stuck anywhere.
The jar can be filled with some water and by capping it with the hand, give it a little shake, and then drain out the water. This will further remove the remnants of the old solution.
Scrubbing the Jar
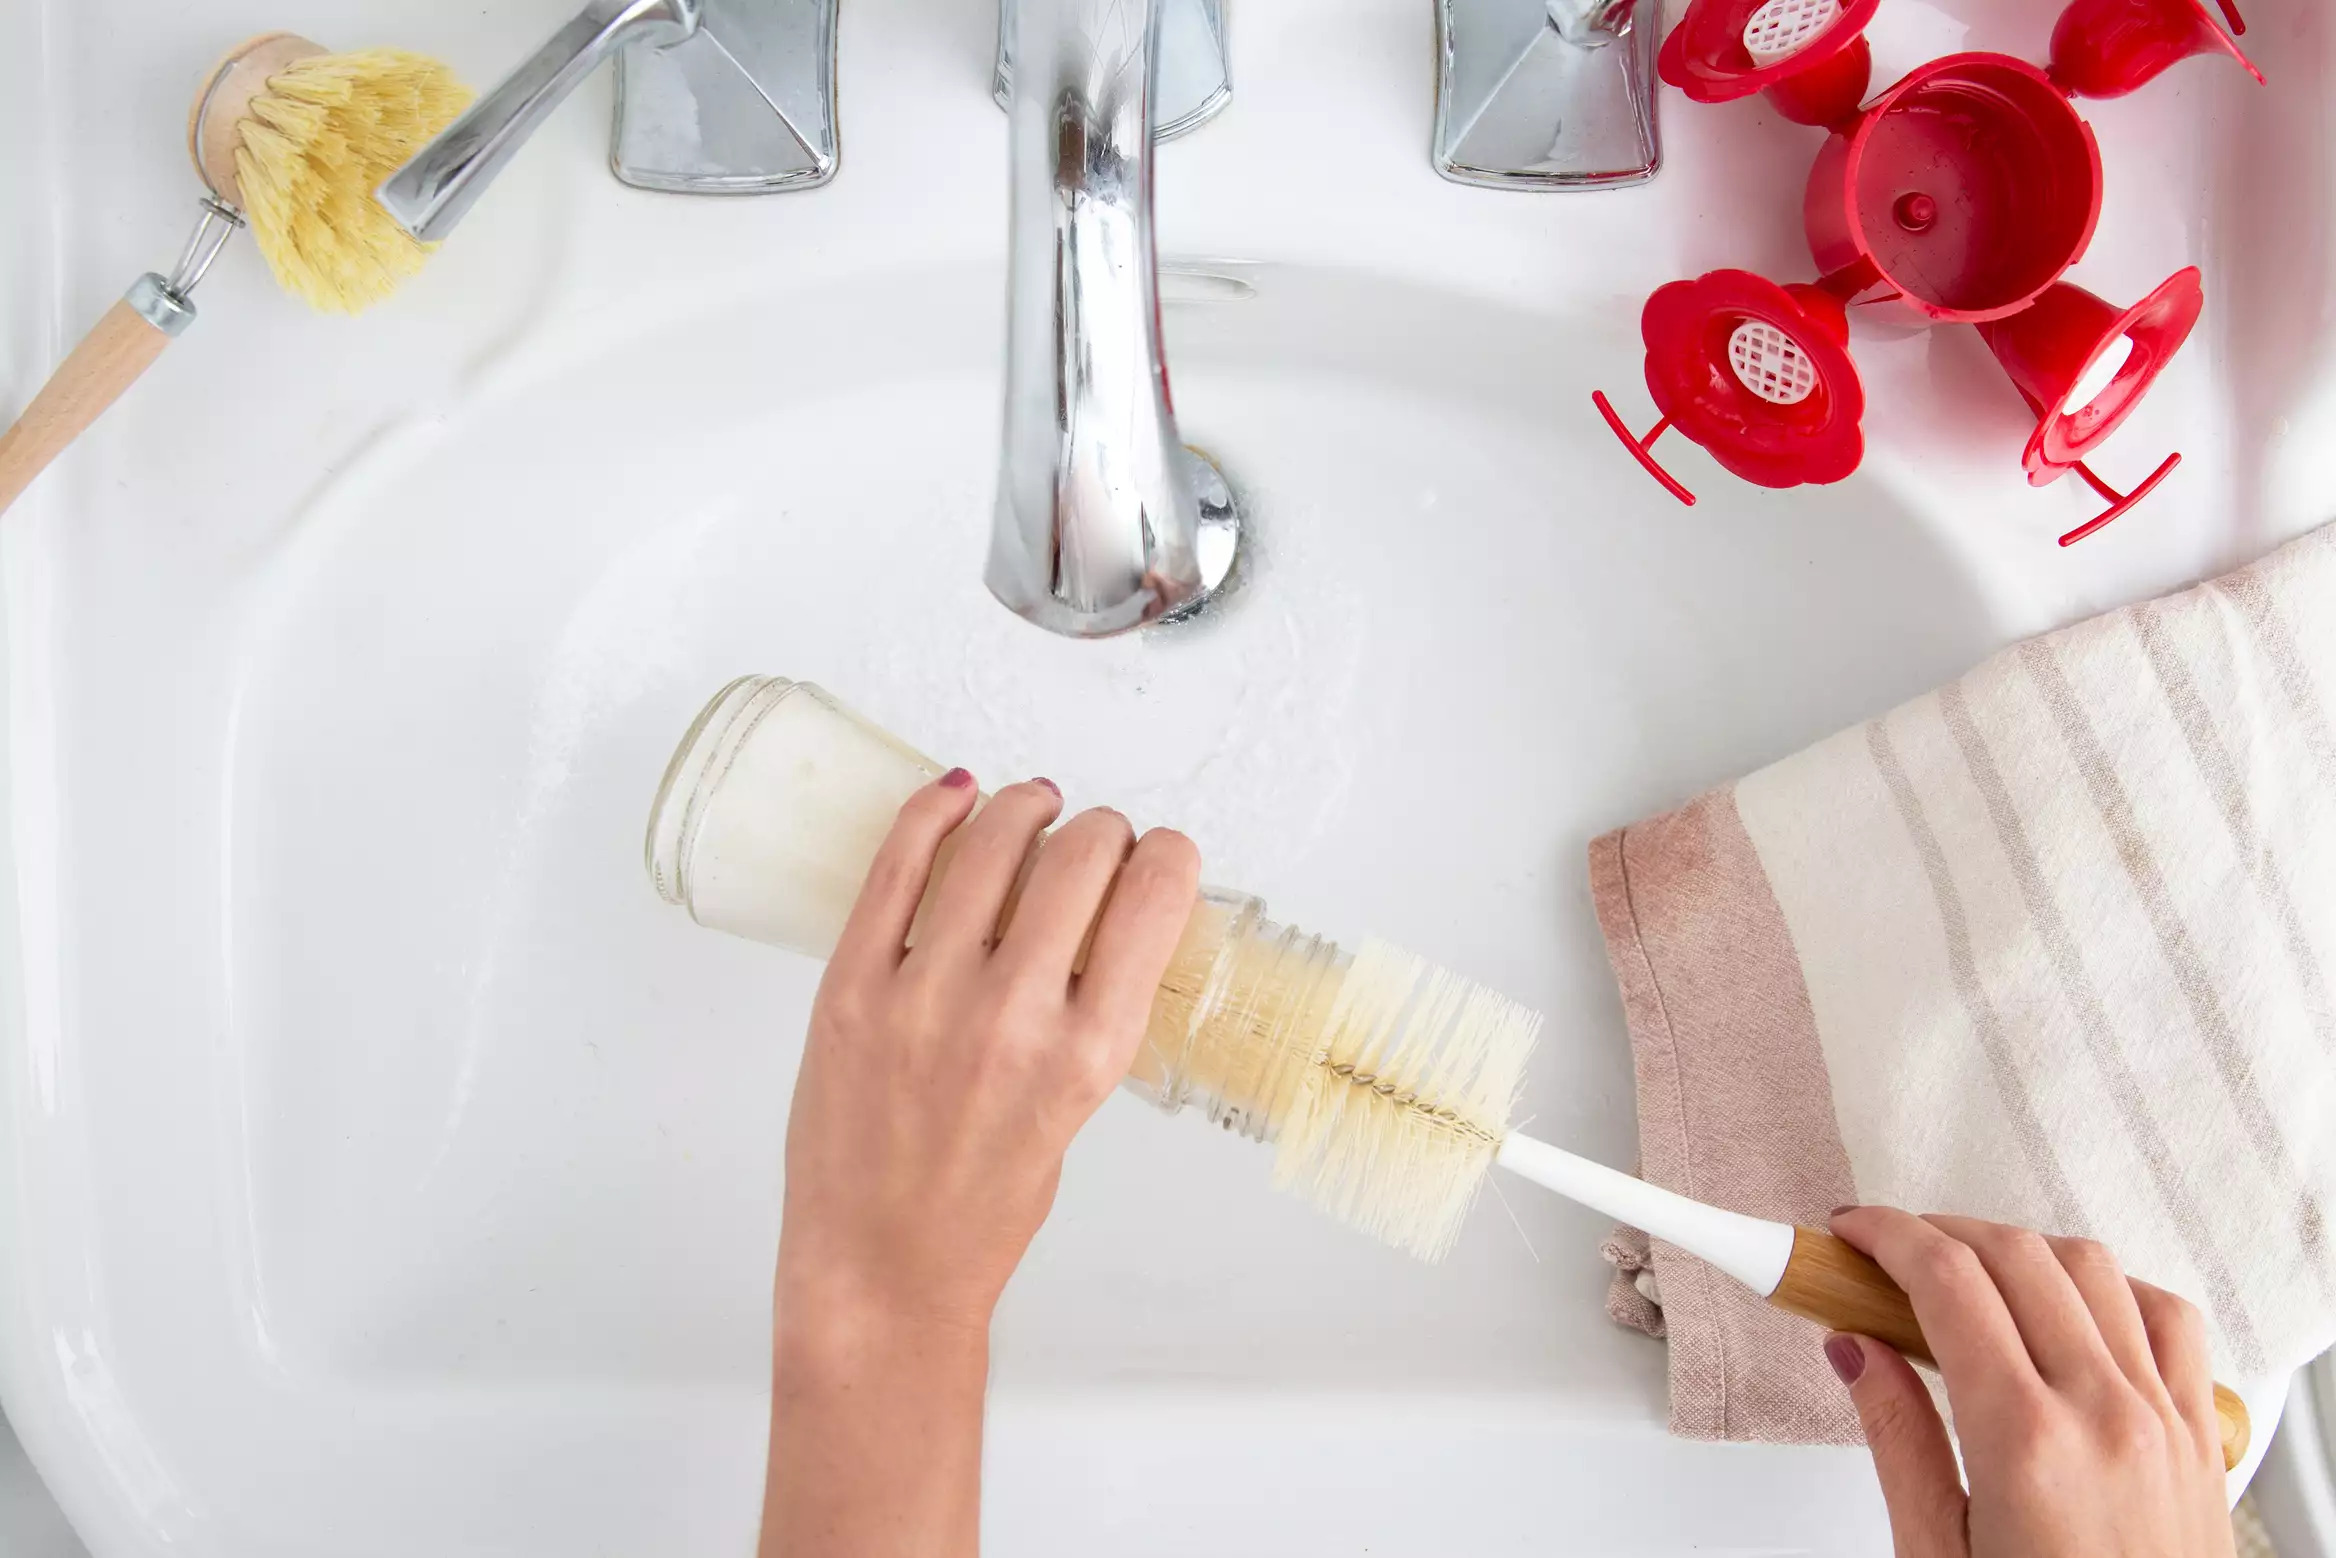
The Jar, also known as the reservoir, is the portion, transparent usually, that stores the nectar solution. The one that was drained out and rinsed in the previous step.
To further clean it, the things that will be needed are the dish-washing solution and the brush used to clean bottles.
Mix the dishwashing solution with some water, put it on the brush, and clean the inside thoroughly. Make sure to clean the hard-to-reach areas as well.
For the outer portion, use any sponge or the same brush, and clean it as well.
Wash it under running water. However, remember to keep the force of water from the tap as low as it can be. Water should not be wasted. Do not keep the tap running unnecessarily.
After the jar has been cleaned the first time, look for any portion that escaped the process the first time. Repeat the cleaning process in that case.
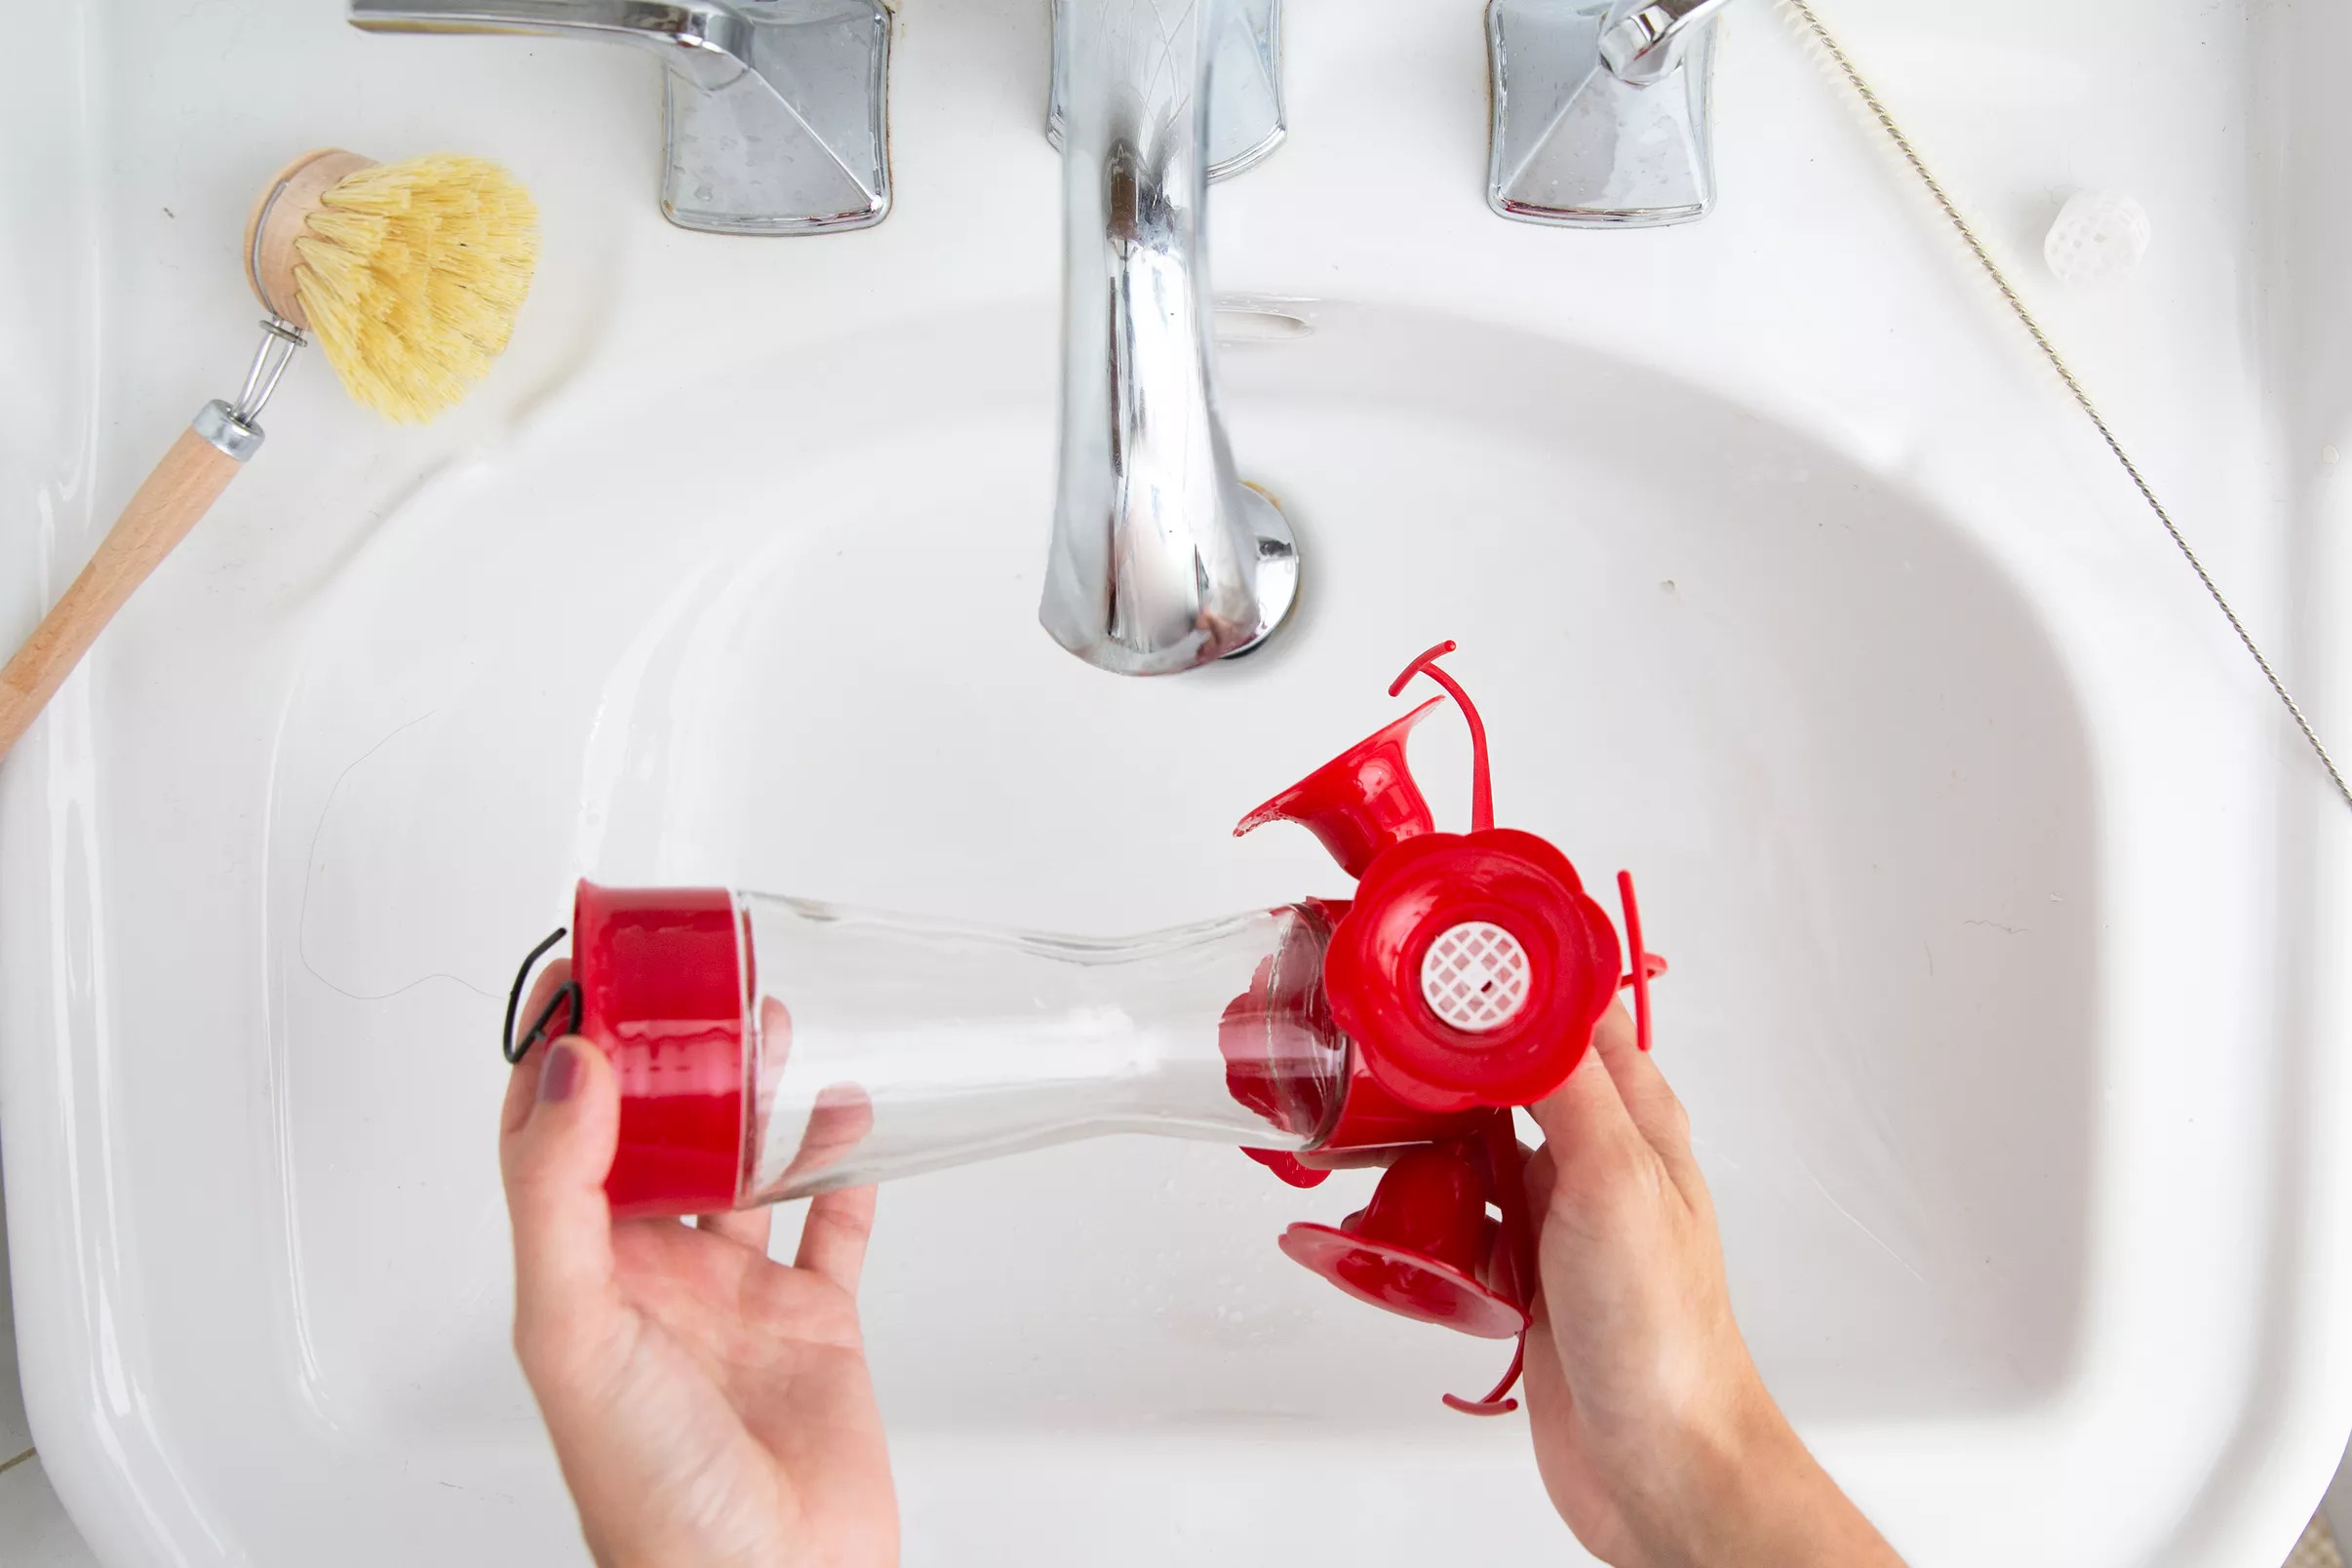
Draining the Feeders
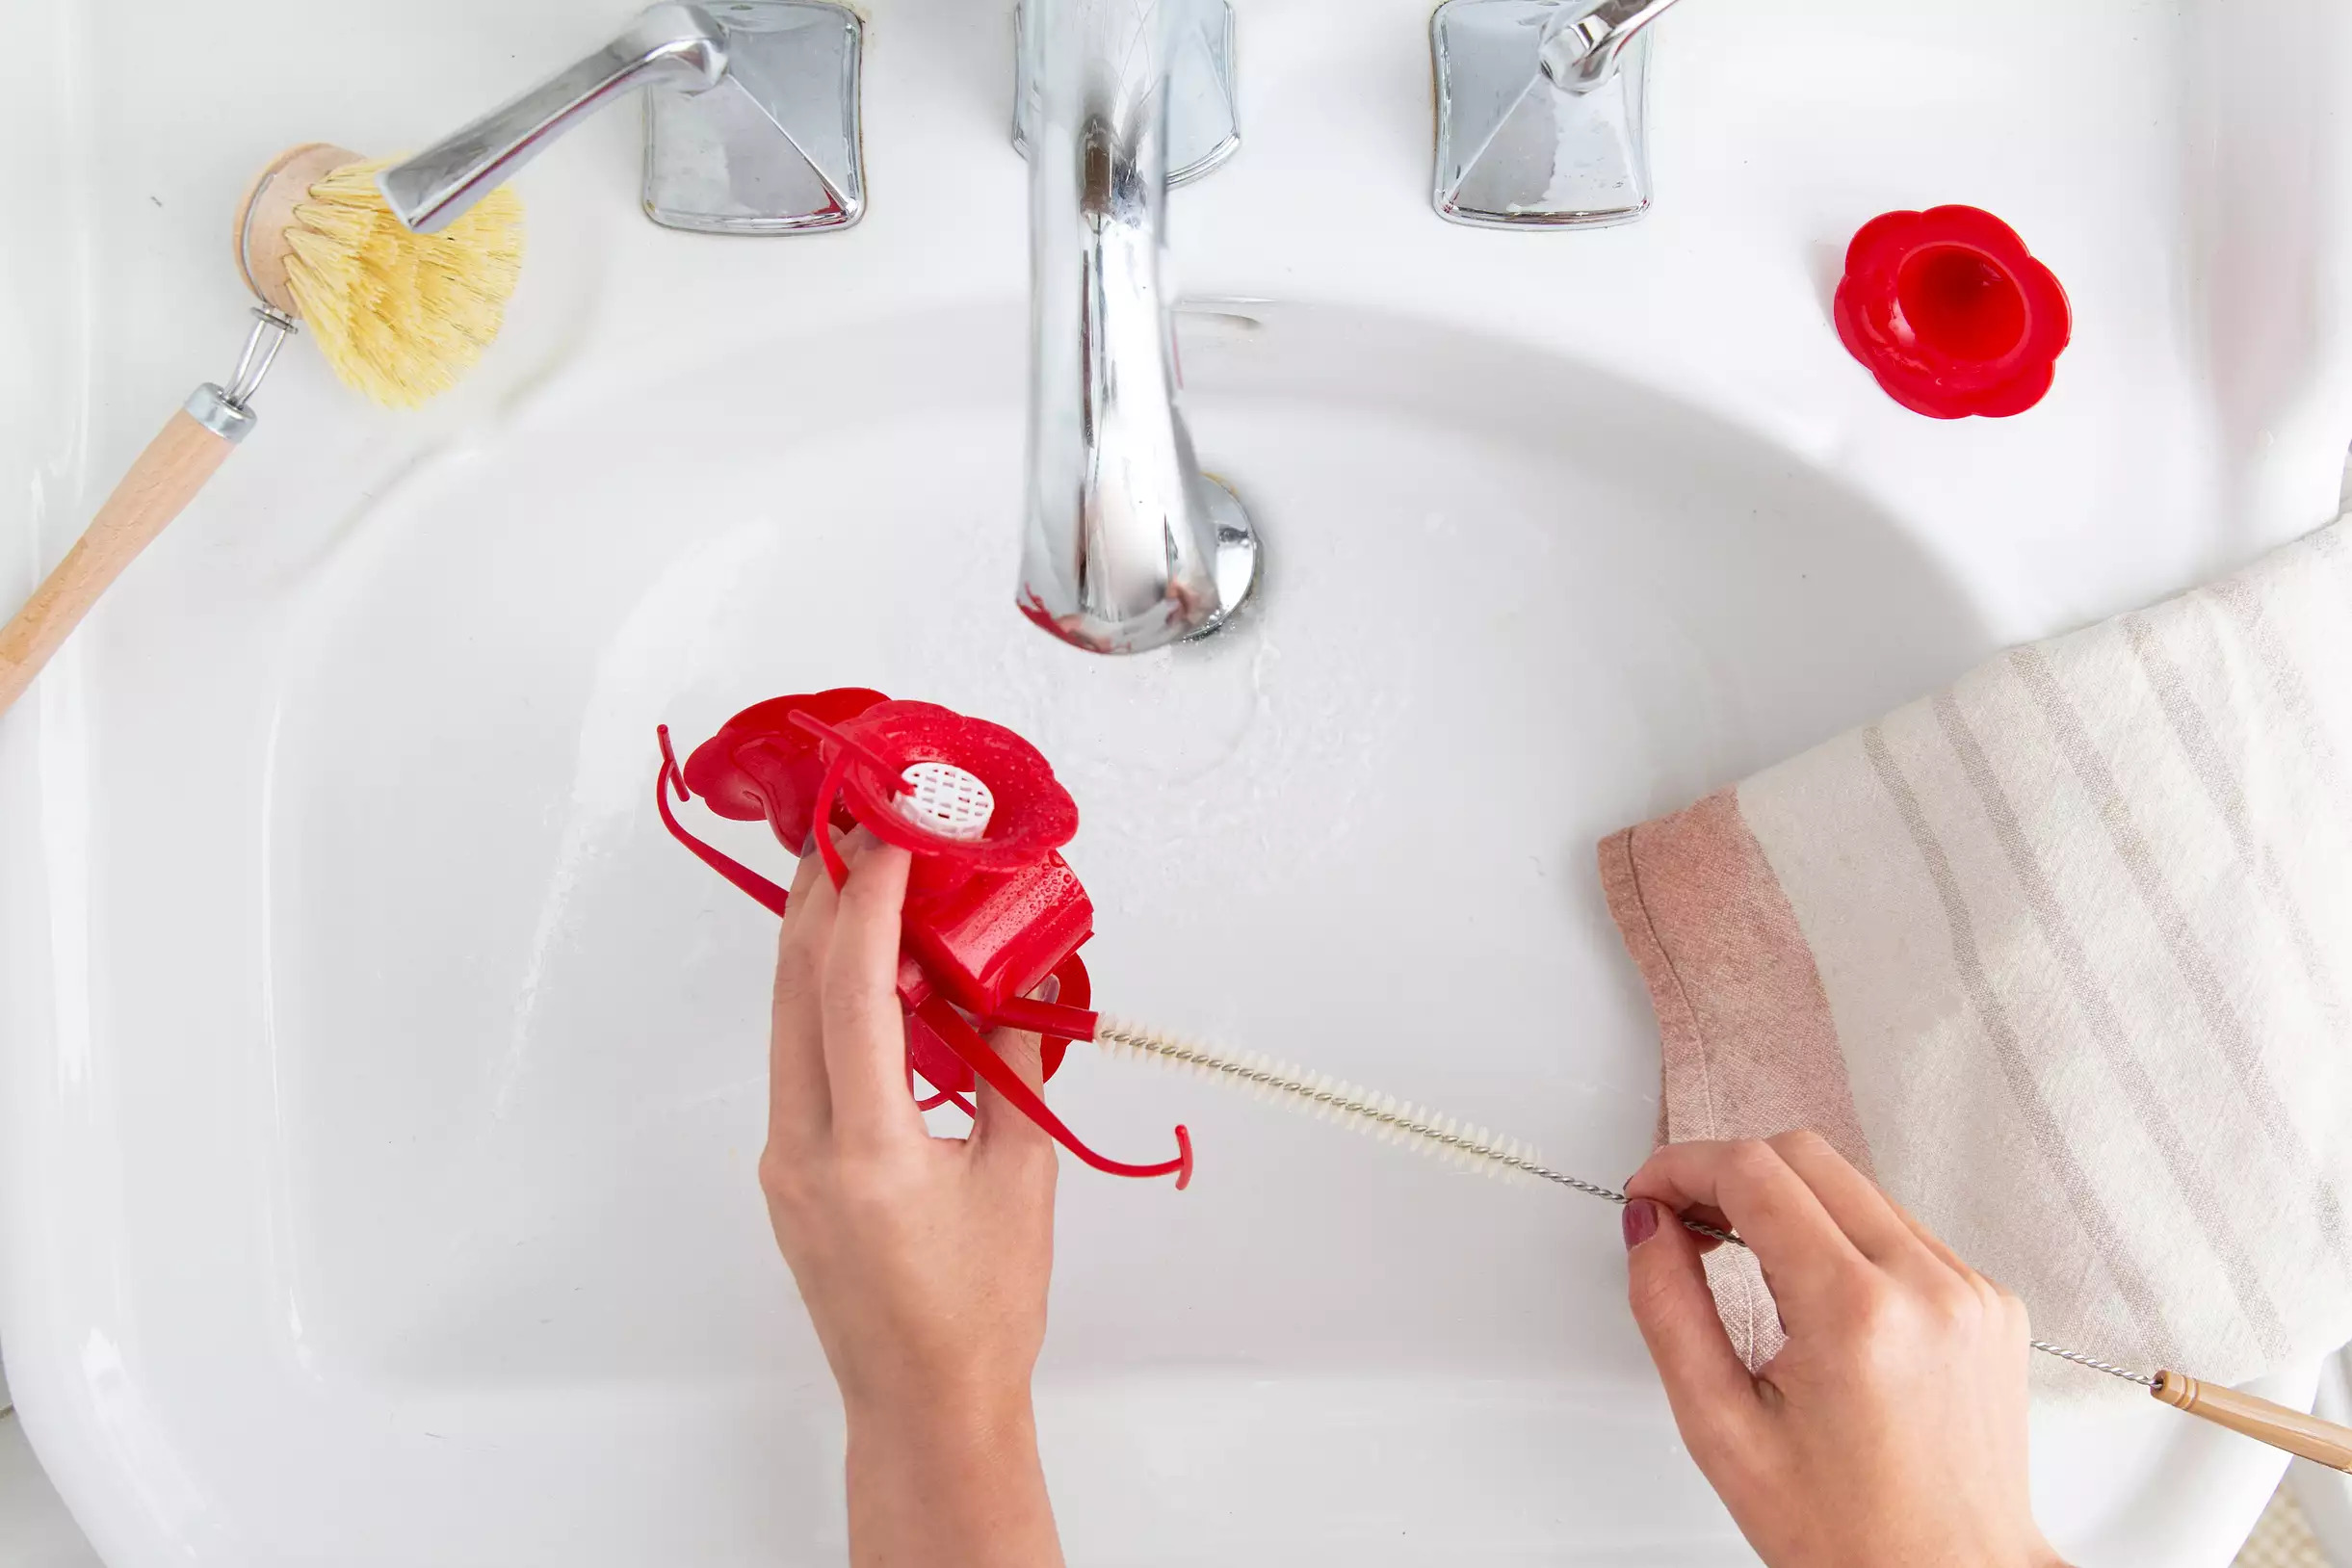
The Feeders or the feeding port, as shown in the image, are the flower-shaped parts from which nectar oozes out.
The hummingbird reaches out to it with his beak and sucks the nectar or the solution from them. Therefore, it almost always has the old nectar solution stuck in its passage and other parts.
Therefore, it needs to be drained out properly. Running water should be used to force out anything else stuck inside. Any small crystallized particles of dust and anything else stuck inside will come out during this procedure.
It helps in the prevention of future blockage of the hummingbird feeder, as well as can be used to resolve any current blockage issue in the feeder.
Scrubbing the Feeder

After draining, comes the scrubbing of the ports or the feeders. Since they are smaller in comparison, the toothbrush is to be used for its scrubbing. Any small brush with bristles can work just as well.
One should not assume that since the feeders look clean, there is no need for scrubbing them. What the eyes cannot see necessarily does not mean that it is not there. Some dirt and fungi are too small to observe via naked eyes. There can be some Molds lurking somewhere on it.
Scrubbing using the dishwashing liquid will clean the hummingbird feeder’s ports even better.
Thoroughly Washing
Once all the above steps have been done, one of the final steps is to rinse all the parts thoroughly under running water or just water. Rinse the ports, the jar, and the base thoroughly for at least twelve seconds.
Do not just focus on the inside but outside as well, rinse there as well. The outside should look just as clean as the inside. Make sure there is no soap or dishwashing liquid stuck inside the jar or ports or outside. If left, it can spoil the nectar that will be put in it.
Drying
The Final Step is to dry the Feeder. Dry it with a clean towel and then keep it on a paper towel and let it dry in the air. If not, then all the hummingbird feeder parts can be kept on paper towels or a soft towel and allowed to dry in the air. However, wiping them with a clean towel will only fasten the drying process.
The feeder can be kept out in the sun to dry as well.
Reassembling
Once dried, the cleaning process is finished. This means it is time to reassemble all the parts and complete the hummingbird feeder. Attach all the parts, and look for any damaged parts. The damaged ones can be repaired and changed as per necessity.
Once all these steps are done, the feeder is all set to feed those little chirpy hummingbirds again. The Feeder can be filled with a sugar-water solution, or a nectar solution again and hung down in the garden or placed wherever it was before. Then just watch the birds come and go, chirp in the garden and create that mesmerizing beauty once again.
How Frequently Should the Hummingbird Feeder Be Cleaned?
How many times a year, a month, or in a week should someone clean the hummingbird feeder?
These questions should arise since the steps on how to clean the feeder are clear now. That is because once the feeder is clean, it will get dirty too eventually. However, when will it be dirty enough that it needed cleaning again is something that can be decided on a whim.
Normally the solution in the jar, the nectar, should be changed every three to four or five days a week. This will keep the feeder prepared for the hummingbirds and the remaining old nectar will not harden up as well.
There is no fixed timing for when to clean the hummingbird feeder, however, it depends on a few things, such as-
The Weather – Depending upon what type of climate is in the region, there will be a need to clean the hummingbird feeder. In summers and close to the monsoon seasons, the weather becomes hot and the air is humid. This type of weather is suitable for the fermentation of the nectar. Thus, in such seasons the hummingbird feeder will have to be cleaned more frequently. It can be done every second day or third day for the best.
The Birds – Depending upon how many birds visit the feeder, the jar will empty up accordingly. So, if there are a lot of birds visiting, then the chances are the jar might need replacement every day or the second day. Therefore, when replenishing the jar, it would be better to just clean the whole Hummingbird feeder as well.
Other than these, whenever there is a clear deposit of molds or the color of the solution in the jar becomes cloudy or milky, the feeder should immediately be cleaned. The same will be the case with any spots, black or green or brown on and inside the feeder.
Alternative Methods to Clean a Hummingbird Feeder
No doubt using the above method, of using a dishwashing liquid or soap and brushes with water is the best and easiest method to clean the hummingbird feeder. It is one of the most recommended ways of cleaning.
However, that does not mean that it is the only way. It gets rid of all the residue solution from the Jar and the ports and cleans the Feeder properly.
Since it is a little time taking process, there are some alternative methods to clean the feeder as well. These will work more as general maintenance of the feeder than a proper cleaning with water.
Using Vinegar – In this, the dishwashing liquid is replaced with vinegar. Mix water with vinegar, in the ratio of 2:1. Just soak the feeder in it for some time and rinse it properly. Dry it and the feeder will be clean enough. The vinegar will dissolve any dust and residual nectar particles or liquid stuck inside the feeder.
Using a Dishwashing machine – A dishwasher’s use is not limited to just washing the dishes. If the Feeder can fit in it, it can be cleaned in it as well. It will not substitute the general cleaning method, and will not clean the moldy residual of fungus or fermented nectar on and in the feeder. However, it will clean it enough to make it fit for use again.
Note– Do find out if the hummingbird feeder that is present is dishwasher-proof or not. If not, then do not put it in, else it can damage or even melt the hummingbird feeder.