
A dry creek bed can be a stunning addition to your home landscape, offering beauty and functionality. Whether you want to control water runoff, add an appealing focal point, or enhance your outdoor space, decorating a dry creek bed is a creative and rewarding project.
This comprehensive guide will take you through the step-by-step process of creating a beautiful dry creek bedthat compliments your landscape and adds value to your home.
Planning Your Dry Creek Bed
1. Identify the Purpose
Before decorating your dry creek bed, it is essential to identify its purposes. Do you want it primarily for aesthetic reasons, or do you need it to manage water runoff during heavy rains? Creating a dry creek feature in your yard requires carefully considering its intended use. Understanding the purpose will guide your design choices and help you make informed decisions throughout the project.
2. Choosing the Location
The next step is to choose the ideal location for your dry creek bed. Factors to consider include the natural flow of water, existing landscaping features, and how the creek bed will fit into the overall design of your outdoor space. Ensure it is visible from more or more than every area and doesn’t disrupt the flow of foot traffic.
3. Determining the Size and Shape

The size and shape of your dry creek bed should complement your landscape and fulfill its purpose. If you are dealing with significant water runoff, a wider and deeper creek bed may be necessary. On the other hand, for purely decorative purposes, a smaller meandering creek bed can create a charming focal point.
4. Assessing Drainage
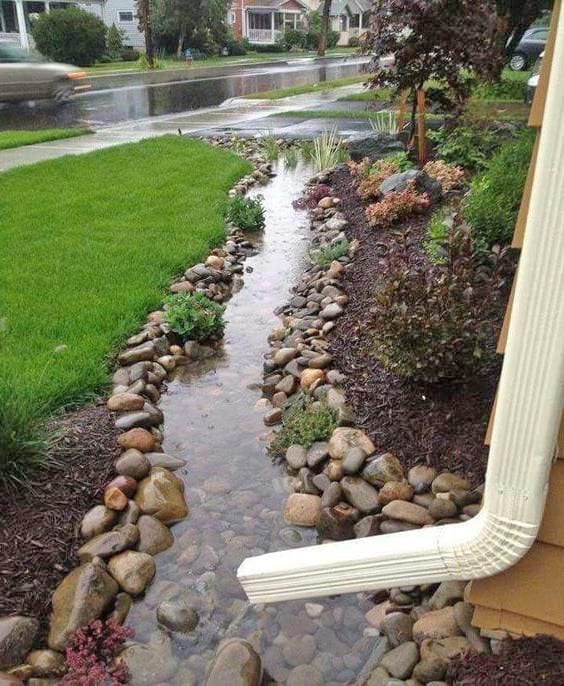
If water management is a primary goal to access the drainage needs of your property, consider consulting a professional to ensure your dry creek bed effectively channels water available from sensitive areas, preventing erosion and flooding.
Tools You’ll Need for Dry Creek Bed
- Shovel and spade
- Pickaxe or mattock
- Wheelbarrow
- Level
- Tape measure
- Garden hose or rope (for marking)
- Gloves and safety gear
- Garden rake
- Tamper
- Landscape fabric
- Stakes and string
- Trowel
Materials to Consider for Dry Creek Bed
- Rocks and stones (various sizes and shapes)
- Gravel or crushed stone
- Landscape fabric
- Native plants or suitable ornamentals
- Mulch
- Edging material (optional)
- Wooden or stone bridges (optional)
- Pond liner (for water features, if desired)
- Low-voltage landscape lighting (optional)
Steps to Decorate A Dry Creek Bed
1. Creating the Dry Creek Bed
Start by outlining the desired shape of your dry crack bed using a garden hose or rope. This layout will guide you during excavation and placement of rocks and plants. The next step is excavating the area. Take out the marked area to create the creek bed. The depth and width will depend on your chosen size and shape and the desired function. Remove any grass, weeds, or debris from the area.
Shape the creek bed with gentle curves and undulating features to mimic the appearance of a natural watercourse. This will create a more visually appealing and organic look. Ensure the creek bed slopes away from your house or other structures to facilitate proper drainage.
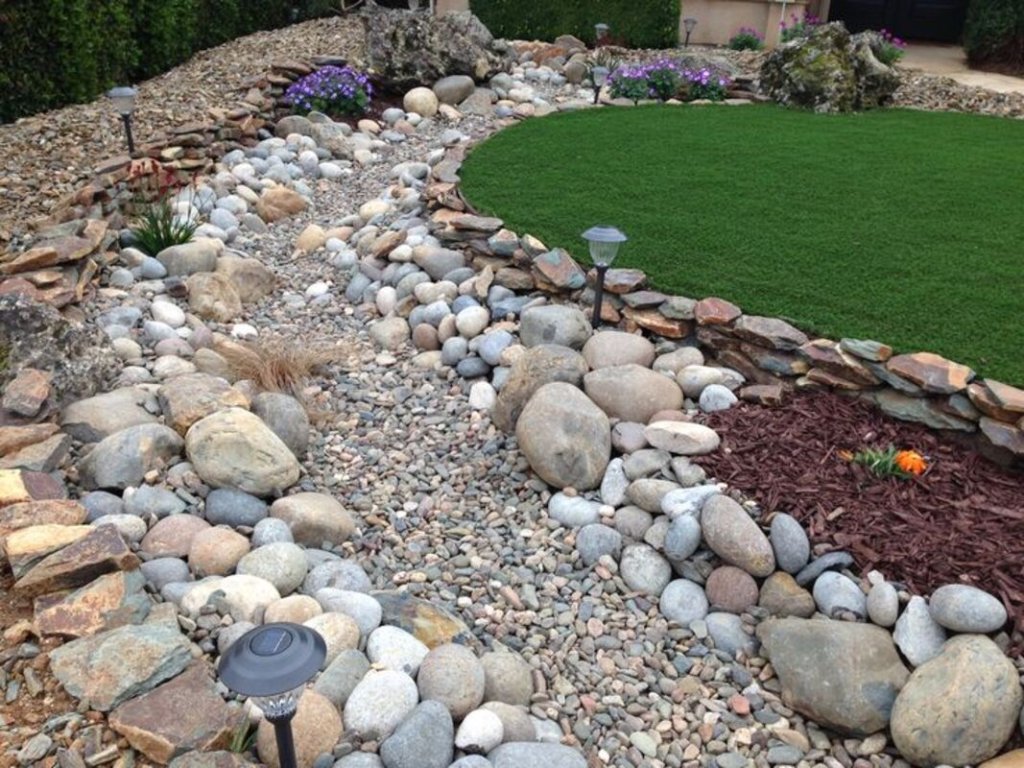
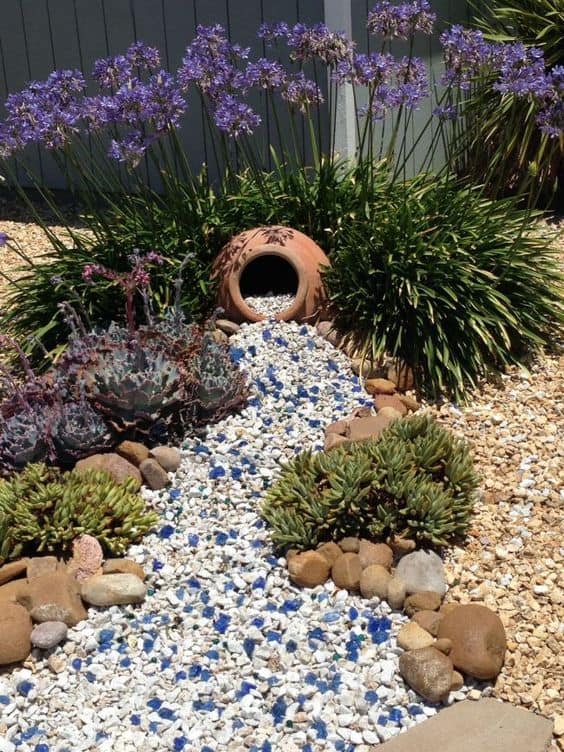
2. Selecting Suitable Rocks and Stones
The choice of rocks and stones is crucial for achieving the desired aesthetic. Consider using a mix of river rocks, boulders, and flat stones to create texture and visual interest. Local stones often blend seamlessly with the surrounding environment. You can source rocks and stones from local landscaping supply stores, or even your properties have available suitable rocks.
Be sure to select stones that are proportional to the size of your creek bed and are easy to handle. Place the rocks and stones strategically within the creek bed. Vary the sizes and angles to create a natural and visually pleasing arrangement. Ensure that the rocks are stable and won’t shift over time.
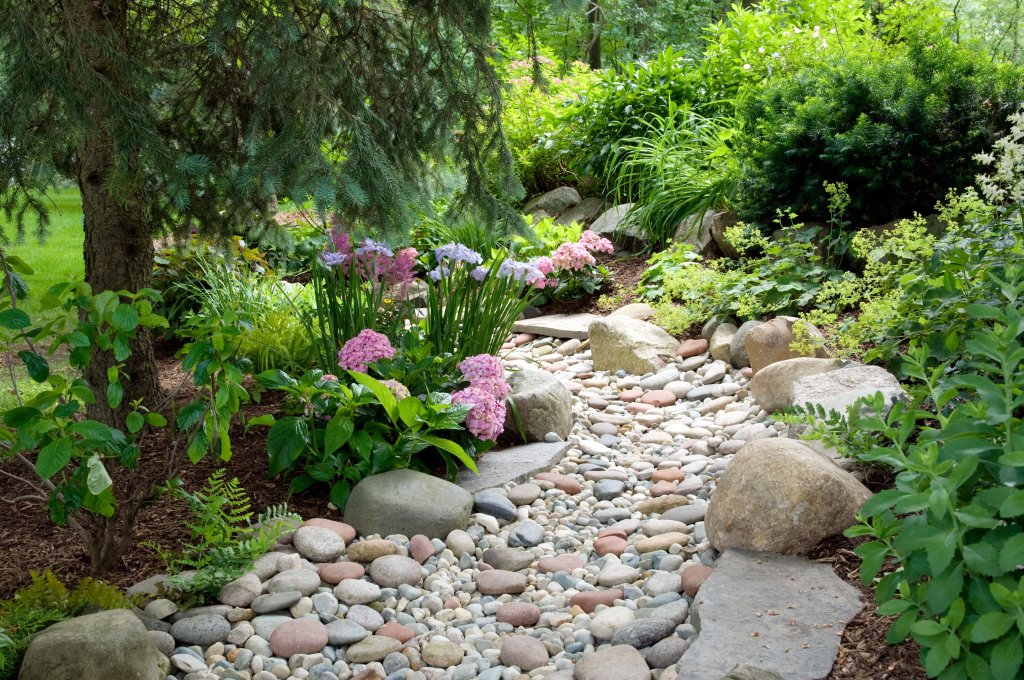
3. Planting Along the Creek Bed
When choosing plants for your dry creek bed, consider using species adapted to the local climate and requiring less maintenance. Select drought-tolerant plants that can thrive in the dry conditions of a creek bed. Group plants with similar water needs together for efficient irrigation. Dig planting holes in the creek bed and add a suitable potting mix if the soil quality is poor. Ensure the plants are well spaced to conserve moisture. Water them thoroughly after planting and establish a watering schedule based on their needs and requirements.
Decorative Features
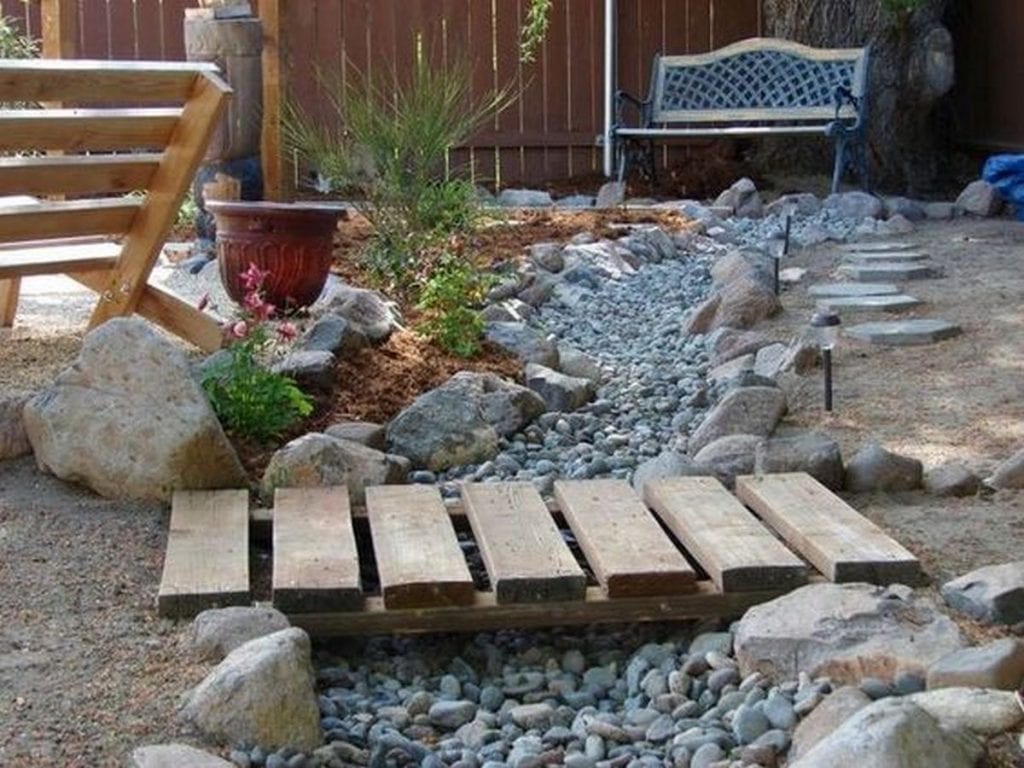
1. Bridges and Pathways
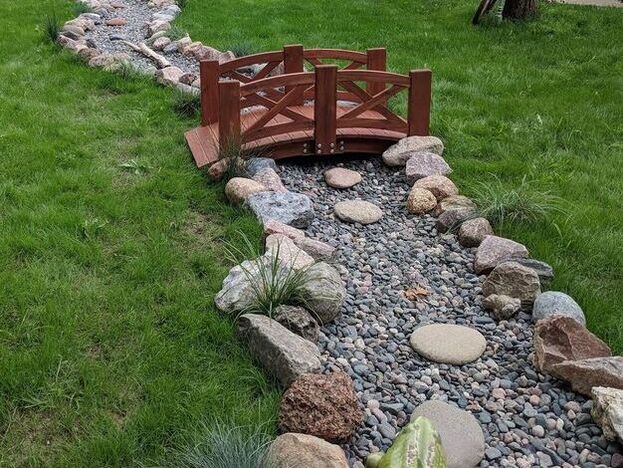
Adding a wooden or stone bridge over your dry creek bed can create a picturesque viewpoint and provide a path for easy access. Pathways made of stepping stones or gravel can enhance the visual appeal and functionality of the area.
2. Water Features
Consider incorporating a small water feature like a bubbling rock, a miniature waterfall, or a small fountain in the middle. These features add an extra point if you want to take your dry creek bed to the next level. The water features provide soothing sound and hence the overall ambiance of your outdoor space.
3. Lighting

Low-voltage landscape lighting can highlight your dry creek bed’s features and create a captivating nighttime atmosphere. Strategically placed lights can showcase rocks, plants, and pathways while ensuring safety in the dark.
Conclusion
Decorating a dry creek bed can transform your outdoor space into a beautiful, functional landscape feature.
Whether you are managing water run-off, enhancing the aesthetics of your garden, or seeking peace for retreat, the careful planning and execution of your dry creek bed will yield impressive results.
Remember to prioritize safety. Choose suitable materials and maintain your creek by regularly cleaning it to enjoy its beauty for years.
With creativity and dedication, you can create a stunning and harmonious dry creek bed that compliments your home and enriches your outdoor living experience.
Also, set up a budget for your project and stick to it. Remember that costs can add up quickly, especially if incorporating decorative features or water elements.
Be resourceful and look for cost-effective options.