
![How to Hang Heavy Frames Without Nails [3 Easy Ways]](https://cdn.eathappyproject.com/wp-content/uploads/2021/08/How-to-Hang-Heavy-Frames-Without-Nails-3-Easy-Ways.jpg)
Decorating our homes with elegant frames and cherished pictures brings joy to many of us.
From family portraits to artwork featuring our favorite fictional characters, these decorations make our spaces feel truly personal.
However, many face a common dilemma: how to hang something heavy on wall without nails.
This challenge often seems daunting, as traditional methods involve drilling or hammering, which can damage walls.
So, keep reading because we will tell you exactly how to hang pictures with nails.
Method 1: Using Picture Hanging Strips
You can get Picture hanging strips from Amazon here:

- Strips
- MAXIMUM FRAME SIZE 24 X 36 INCHES: One package includes 14 pairs (28 strips total) of the Command...
- WORKS ON A VARIETY OF SMOOTH SURFACES: Wall hanging strips work on a variety of smooth surfaces,...
- SURFACE PREP: Clean the desired surface with rubbing alcohol to remove grime and dust to allow the...
Step 1: Adhesive picture hanging strips require a smooth surface to function correctly, so any hanging hardware mounted on the back of the image must be removed. This involves nails, screws, or anything else that may make the Picture’s back surface irregular.
Step 2: Have the surfaces cleaned. Adhesive picture hanging strips require a clean surface to adhere properly, so with a clean cloth and isopropyl alcohol, wipe down your Picture and the wall where you are going to hang it.
Step 3: Apply hanging strips. Press the two sides together for every set of stripes. Next, remove one lining and push the adhesive to the back of the picture one set at a time. Continue pressing till you feel the strip is perfectly attached. Repeat until sufficient strips are used. 4 pairs hold 16 pounds maximum frame size of 24 inches x 36 inches.
Step 4: Attach the image to a wall. Second, cut the liner to expose the adhesive on the outside of the strips. Then, against the wall, press the photo. Separate the stripes on the image slowly from those on the wall by gently pulling and raising the bottom corners of the frame.
Step 5: Wait for some time, let the adhesive on strips set, and dry. Afterward, put the frame back onto the wall by lining it up with the stripes.
Method 2: Using Velcro Strips
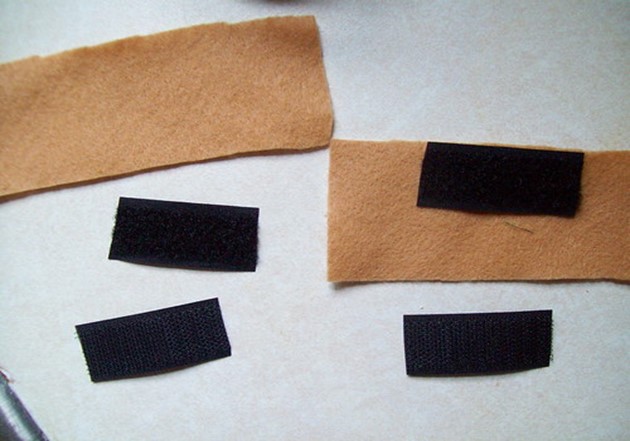
Another way on how to hang pictures without nails is using Velcro. To do this.
It comes in all shapes and sizes, and to make your process more straightforward, there are also Velcro strips made especially for hanging frames. So, some Velcro strips, a stage, and your Picture are all you will need, and you are ready to start hanging.
Step 1: Purchase hanging strips of Velcro powerful enough to hold your portrait. The Velcro brand sells Velcro strips designed specifically for hanging image frames, and they are called Hangable Picture Hanging Strips. Find these strips in a home improvement or big box store and select the ones built to carry your frame weight.

- STRONGER ADHESIVE HOLD: Removable hook and loop wall fasteners feature an upgraded adhesive backing...
- EASY PEEL TAB FOR DAMAGE-FREE HANGING: Simple on/off application with an easy to remove peel tab;...
- WORRY FREE MULTI-ROOM DECORATING: Securely fastens to most non-porous surfaces: smooth tile,...
- HANG MEDIUM-SIZED FRAMES OR WALL MIRRORS: Low profile corner strips provide an angled surface space...
These strips can hold 13 pounds. But, of course, it depends on the size of the strip you buy.
Step 2: Wipe the wall down to clear any dirt with a clean cloth. To remove surface dust, use a dry cloth or wet the fabric with clean water to wash any dirt or residue off. For a few minutes, let the wall dry so that the Velcro sticks to its securely. Before applying the Velcro, washing the wall will make sure the adhesive holds much stronger. Velcro works best on smooth surfaces such as tiles, wooden surfaces, etc.
Step 3: To label where the Picture will go on your wall, use a level. Decide where you would like to hang the picture frame and hold it up to the wall at that point. To mark an even line that you will use to place your Picture on the wall, use a pencil.
Step 4:On top of the Velcro that is attached to the frame, place the wall-side Velcro. Once the frame-side Velcro is on all four corners of the back of your picture frame, place the wall-side Velcro on each one so that they are stuck to each other. There should be a pair of Velcro pieces lined up in each corner.
It would help if you were facing the adhesive side of the Velcro that will stick to the wall.
Step 5: Remove the wall-side support of the Velcro and pin it up against the wall. The last bits of paper or plastic covering the sticky side of the Velcro that will adhere to the wall are peeled off. Until all 4 of them have been peeled off, use the marking you made in pencil to line your image frame up against the wall so that the photo is even.
Now we will see how to hang pictures without nails:
Step 6: For 30 seconds, press the image into the wall. Press the frame into the wall with the Picture lined up straight so that each corner has pressure on it. To allow the adhesive time to stick and attach well, push the image into the wall for some time.
Step 7: To separate the Velcro, slide the framework up and away from the wall. Instead of immediately moving the frame away from the wall, shift it up and out so that you do not take the Velcro off. The only thing on the wall should now be the wall-side Velcro.
Gently and slowly take the photo off the wall.
Step 8: When you press it into the wall, rub the wall-side Velcro for 30 seconds. Put down the image and use both hands to use your fingertips to rub the Velcro strips that are still stuck in circles to the wall. Please do this for at least 30 seconds so that it has time to adhere properly to this adhesive backing.
Step 9: Put the image back on the wall after 1 hour by lining up the Velcro strips. Let the Velcro strips remain on the wall for 1 hour so that they stick entirely without retaining any weight. It is safe to hang your Picture on the wall after an hour! Line up the strips of Velcro so that they are on top of each other and firmly push the photo into the wall so that the bits of Velcro stick together.
- Super Grade Material :The 2 inch black hook and loop tape made of high quality nylon fabric with...
- Incredibly Strong :Forget the flimsy old traditional double sided tape! Whether you're mounting,...
- Say Goodbye To Holes and Screws: It can be used on securing cat window perch, fastening curtains...
- Wide Compatibility: The double sided sticky back mounting tape works great in any clean and flat...
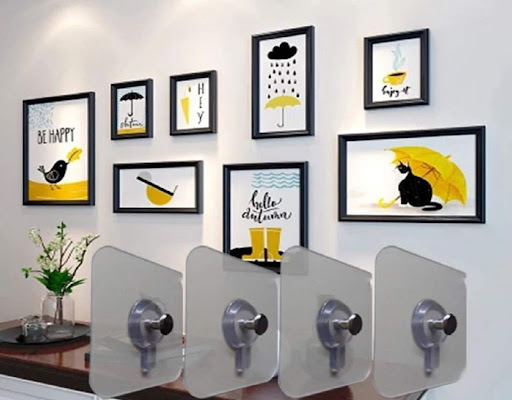
Method 3: Adhesive Hooks
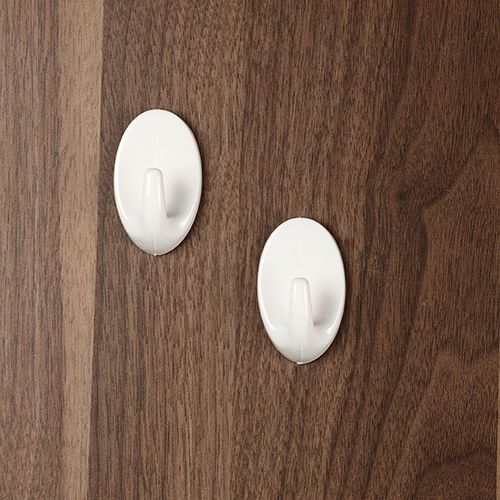
You can buy adhesive hooks here:
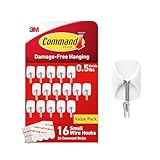
- HOLDS UP TO 0.5 POUNDS: One package of the Command White Small Wire Toggle Hooks includes 16 wall...
- DAMAGE FREE HANGING: Wall hooks work without leaving holes, marks or sticky residue so you can move...
- WORKS ON A VARIETY OF SMOOTH SURFACES: Adhesive wall hangers work on a variety of smooth surfaces,...
- SURFACE PREP: Clean with rubbing alcohol to remove grime and dust to allow the hanging hooks to bond...
The main advantage of adhesive hooks is that it uses adhesion and attaches itself to a wall and we can hang anything we want. But as this article is about how to hang frames without nails, we will tell you step-by-step how to hang pictures without nails using an adhesion hook.
Step 1: Slide the hook back off. To make installation simpler, adhesive hooks typically have a backplate that can be removed. To loosen it from the hook, turn the adhesive hook upside down and slide the back piece down. Set the hook aside until the hook piece is removed from the backplate.
It is possible to buy adhesive hooks from your nearest grocery store.
Smaller hooks with adhesive cannot have a removable back. You can skip this step if your hooks do not. For hanging clothes or heavy items, adhesive hooks can be huge or small to hang images. Choose the hook style that fits best with what you want to hang.
Step 2: From the adhesive strip, remove the backing and press it onto the backplate. Your box of hooks will come with adhesive strips and should be double-sided. First, locate the side of the adhesive strip that is supposed to bind and peel off the protective coating to the backplate. Next, push the adhesive strip tightly onto the flat side of the backplate so that the tab points down. Keep the strip for 30 seconds on the backplate to ensure it is completely adhered to.
Press the strip directly on the backside of the hook if your hook does not have a flexible backplate.
Step 3: Slide on the wall with both the hook and wait 1 hour before hanging it. Keep the hook piece over the backplate so the tab lines up in front of the hook with the hole. Slide the hook down onto the backplate to protect the hook before the tab clicks into place. Leave the hook empty for at least 1 hour so that the adhesive has time to set completely.
Do not hang anything more than 2.3 kg (5 lb) on large adhesive hooks as they could break away from the wall. To see how much weight they can carry, read the instructions carefully if you have smaller hooks.
Method 4: Using Press-In Hooks
You can purchase Adhesive hooks here:
No products found.
Here is the step-by-step guideline to hang a photo frame:
Step 1: Have your hooks picked. Many brands produce hooks that are built to be incorporated into drywall without hammers, nails, or any other materials. These include Hercules Hooks, Gorilla Hooks, Super Hooks, and Monkey Hooks. They are made of various materials and rated to hold different weights, but each needs a small hole in the wall to be formed. According to the producers:
- As much as 150 pounds can be carried by a Hercules Hook (68 kg).
- Up to 80 pounds can be carried by a Super Hook (36.28 kg).
- Up to 35 pounds can be carried by a Monkey Hook (15.87 kg).
- As much as 50 pounds can be carried by a Gorilla Hook (22.67 kg).
Step 2: Label where you want to use a pencil to position your hook. If you intend to hang a wire-backed frame, make sure you mark where you want your hook to be inserted. The only thing you do not want to make a hole in the plaster is to cut the hook and do it again. To help the wire backing, larger frames can need more than one hook, so be sure to measure so that the hooks are in an even alignment so that your frame does not lean!
You can use a ruler or tape measure to ensure the hooks are in place.
Step 3: Have your hooks mounted. Push through the drywall with the long, curved (not kinked), tapered end of the hook. Rotating the wrist while inserting can make it easier to push through.
Step 4: Press and twist the hanger into the wall until the hook is up on the right side. The wire can slip easily through the wall after inserting the hanger’s straight end. Rotate the hanger so that the wall’s inside presses against the hook’s straight end. It can slip to the hanger’s hook.
The hook should settle and provide a firm hold in place. Ensure the plasterboard hook is safe, steady, and not wobbly.
Step 5: Hang your Picture. Most hooks for press-in come in packs of four or more. Please measure the Picture’s width and split it into thirds to hang heavier pictures using two hooks. At the one-third mark, place one hook, and at the two-thirds mark, set a second hook. Next, calculate the Picture and split it into quarters for even heavier images that need three hooks. At the one-quarter mark, put one hook, one hook in the middle (two-quarters), and one hook at the three-quarter mark.
Conclusion
Overall, learning to hang something heavy on a wall without nails doesn’t have to be daunting.
You can easily and securely display your heavy frames and artwork by utilizing adhesive picture hanging strips, Velcro strips, and adhesive hooks.
These methods preserve the integrity of your walls and offer a flexible way to decorate your space.
Welcome these nail-free solutions and transform your walls into a canvas of memories and art, all without worrying about damage or permanent alterations.