
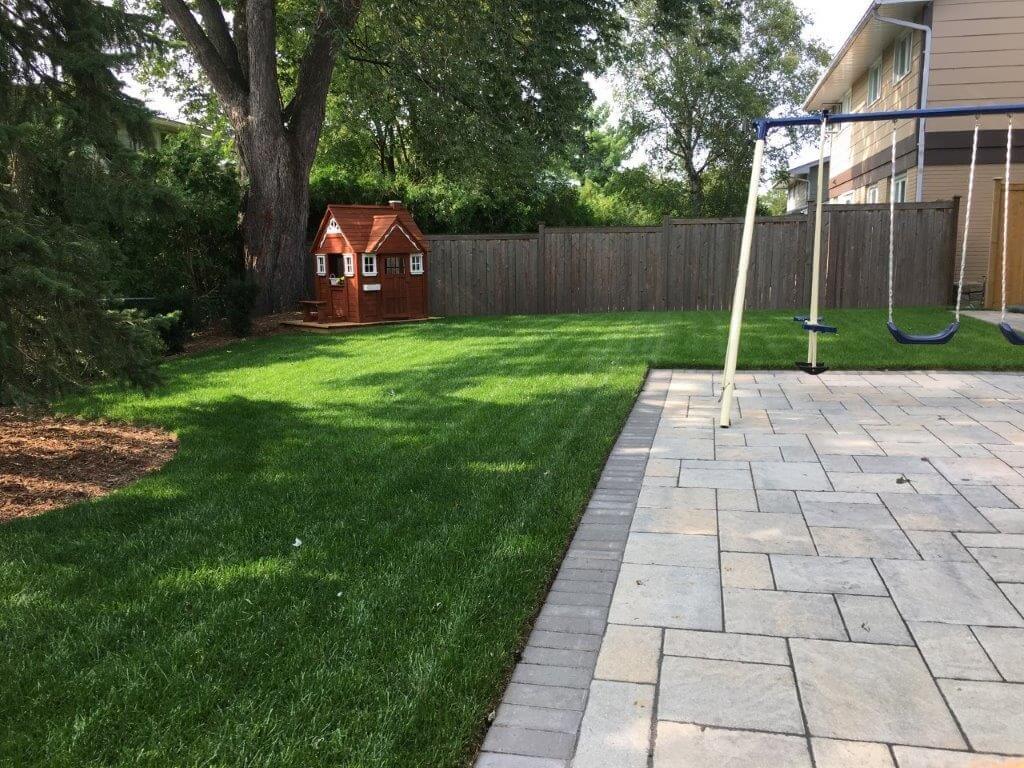
We are in an era where we have help for every task ever, from washing our dishes to getting our groceries to landscaping our backyard. So why are you reading a blog about How to landscape your front yard and backyard by yourself?
However much easier it will be for you to hire someone to design and maintain your lawn for you, you will not ever be satisfied with the results because it will not be the same product you wanted. It is like eating in a restaurant.
You will order your favorite dish, but it will always have that one vegetable you detest. Whereas when you make the same dish at home, you get to choose what vegetables to add and what ingredients to miss.
The same is with landscaping your lawn. Not only will your lawn be Homemade, but you can also brag about it being a zero-cost, zero investment beauty! Following this guide will take you a lot closer to your dream lawn.
Step 1: Gather Your Tools
Like Bob, the Builder said, “We work together to get the job done,” you and your tools must work together to get your lawn done. You require a team of tools for this. Here is a list –
- Tiller
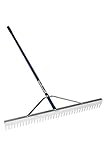
- Landscaping Rake
- Flathead Shovel
- Mower
- Dethatching Machine
- Or Thatch Rake
- Bow Rake
- Push Broom
- Sand, Topsoil, Compost.
All these tools are readily available online or at your nearest hardware store, or borrow them from your neighbor if you want to go for a zero-cost landscaped lawn.
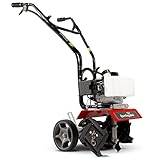
- VERSATILE – Perfect for weeding, mixing and aerating your garden soil
- CONVENIENT - On-board wheels adjust for transport and depth control.
- CONTROL - Overhand control reduces bouncing and jumping allowing you to remove the weeds, not your...
- POWERFUL - This cultivator's Viper engine provides plenty of power to work gardens of all sizes.
- Power Source Type: Wood
- Features long, rounded teeth provide a smooth, non gouging raking action, while its striking edge is...
- It has a solid alumum plug in the head to handle connection; measures 66-inch length by 46-inch...
- Strong wrap around bracng and heavy duty double rib consuction maxizes head stability

- GARDENING ESSENTIAL: Heavy duty, ergonomic shovel ideal for a variety of gardening tasks like...
- MAXIMUM POWER AND PRECISION: Welded, all-steel construction boosts power for digging in tough soil...
- LONG-LASTING AND RELIABLE: Steel head and blade stay sharp through heavy use and provide excellent...
- QUALITY GARDEN TOOLS: Designed to help you cultivate a better garden, Fiskars garden and yard tools...

- [16" LAWN MOWER] - This 40V lawn mower cuts up to 1/3 acre with fully charged 4.0Ah battery (varies...
- [ULTRA LIGHTWEIGHT] - 35% lighter than steel deck mowers
- [SINGLE LEVER HEIGHT ADJUST] - 5 position height adjustment
- [2-IN-1 SYSTEM] - Mulch and rear bagging

- KEEP YOUR YARD HEALTHY : dethatch in early spring or early fall for cool-season grasses, and in late...
- POWERFUL MOTOR : 10A motor provides the power you need to tackle the toughest jobs
- 14” DETHATCHING PATH : allows you to complete jobs faster and more efficiently
- 3-POSITION HEIGHT ADJUST : provides greater control by removing matted layers to promote lawn health

- Revive Soil with Less Effort: The Yard Butler Manual Lawn Coring Aerator improves airflow and...
- Built for Durability & Comfort: Crafted from a powder coated steel design and engineered for...
- Ergonomic & Efficient: Features a long handle for extra leverage, this DIY lawn care tool is easy to...
- High-Quality Gardening Supplies: Yard Butler garden tools are designed to last a lifetime so you can...
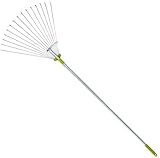
- ✅ 63 Inches Long. Similar rakes on Amazon are only 48 inches long. The adjustable head expands...
- ✅ 15 Flat Tine Expandable Head. Adjust the rake width to a tiny 7 inchs for tight areas. This rake...
- ✅ 3/4 Inch Zinc Plated Steel Handle that is zinc coated to prevent rust.
- ✅ Very light weight and easy to use, the rake is an ideal leaf rake. Note that it is not designed...

- HIGH-QUALITY CONSTRUCTION. Alpine Industries’ Multi-Surface Push Broom is expertly crafted with a...
- EFFICIENT SWEEPING. An ideal addition to your cleaning supplies, this Multi-Surface Push Broom is...
- VERSATILE USE. Suitable for both indoor and outdoor use, this push broom is perfect for all of your...
- CHOICE OF SIZE. Depending on your needs, the Alpine Push Broom is available in an 18-inch and...
Bob the Builder, Can we lawn it?
Bob the Builder, Yes, we can!
STEP 2: MOW THE LAWN
Mow, Mow, Mow the lawn
Gently to avoid the grass blades
Mow, Mow, Mow the law
To avoid the dry grass!
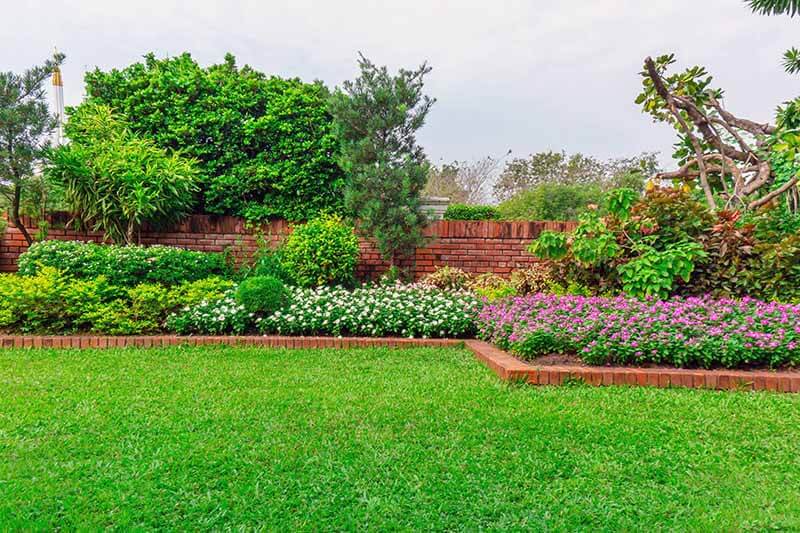
You can decide how much leveling your lawn needs by practically scanning it for apparent lumps and bumps all around your yard. Taking this step will save you from digging the entire yard or digging upon an area to realize later that you would have been off mowing or de-turfing that piece of land.
Cut the grass short, but not so short that the grass blade stems become visible. If that happens, your lawn will turn from lush green to burnt brown, which might only be attractive to those who wanted a forest fire effect!
Step 3: Dethatching
Look closely around the lawn, literally at the grass-root level, to determine the amount of Thatch on your lawn.
Thatch is the layer of decayed grass or other organic materials at the bottom of the turf.
A quarter to ½ inch thatch is acceptable, but any more than that will prevent the grass from getting enough air, water, and nutrients for healthy growth and a lush look. Red berries is also a good option for your garden.
If you have more than ½ inch of Thatch, dethatch it by merely running a thatch rake over the surface to pull it up from the ground. If there is too much Thatch around the lawn, preferably run a thatching machine over the entire lawn rather than manually with a thatch rake to save time and energy and give it a professional look.
Step 4: Re-turf That Lawn
For holes or depressions in your lawn, you might want to steer clear from re-turfing the entire land, but add topsoil to those potholes to level out the low land and reduce the bumps with a shovel.
This can be done by putting the soil you removed during leveling (Step1).
Disclaimer: Remove the rocks and clots as you use the old soil to re-turf.
If you have significant depressions on your lawn, you can remove the grass on top of them before filling the holes with the topsoil.
Then dig up the sod (part of the land with grass growing on it) by putting the shovel from the outside edges of the low spot, gently sliding it down and under to get under the grassroots. Slowly probe the grass, using the shovel to get the grass up and expose the dirt underneath.
Now fill the hole with the topsoil and compost mixture and put the grass back on top of the turfed area.
Step 5: Levelling
Spread the topsoil on the entire lawn in a thin layer, using your shovel to even out your turf. Disperse the topsoil mix across the area of land to cover a depth of ¼ to ½ inches. If you come across hindrances on your landscape during leveling – for example, a tough to remove tree stump – you can always contact a team like the Milwaukee backyard maintenance and tree care for help.
You may think your grass needs more soil than that, still stick to a thin layer as a thick layer will choke your grass and stop its growth and damage its health.
Spread the mixture evenly through the grass by pulling and pushing the mixture with the back of a bow rake. Be sure not to let your soil cover the grass blades to avoid sunlight deprivation.
To do this, after the bow rake, push a push boom through your grass to mix the soil well, and make it settle at the base of the turf, and make the blades 100% visible.
If necessary to add a second layer, add it after Step 7, Watering your Lawn.
Step 6: Flattening the Soil
You can flatten your soil for an even finish by using the back of your landscaping rake. To ensure an even level by checking your progress from time to time while flattening the surface.
Step 7: Watering Your Lawn
This is a crucial step, as watering the lawn makes sure that the mixture of topsoil you put in Step 5 settles at the bottom of the grassroots once and for all. This step also helps to fill the air gaps.
Watering also refreshes your lawn, replenishes the nutrients, teaming up with your topsoil mixture and compost and clears up all the dirt on your grass, and gives it a nice, lush green look (finally!!)
For all you Petrichor’s out there, you will love the earthy smell of your lawn after the watering. It is wholly liked the smell we like after the rains. Make sure to get your tea ready before you go ahead with this step, and you will want to sit and enjoy the rain-like smell for a while!
Step 8: (If Required) Repeat Step 5
If you are still not satisfied with the thin layer of soil you had put in Step 5 or feel that the layer is too thin, you can repeat step 5 and add a second layer of soil and then repeat step 7 re-water your lawn afterward.
Yippee! You successfully lawned your lawn! You are so ready to flaunt your efforts to those neighbors who pay thousands to maintain their lawn!
To give your lawn an even more attractive and homely feel, go for those must-have accessories you can create yourself, further promoting a zero-investment, 100% homemade lawn.
Accessorize Your Lawn
“A garden is a thing of beauty and a job forever” – Richard Briers
Top 5 DIY Ideas for Your Lawn
Brick Decor
Paint old bricks lying around your area, paint them with colors of your choice and then add titles of books or quotes or words of your choice on the edges or top. It can be a great topic of conversation at your next lawn-party!
You can also paint the rocks of different sizes and make designs on them and place them on ledges or the side of stairs, or coffee tables.
Garden Watering Can-Light
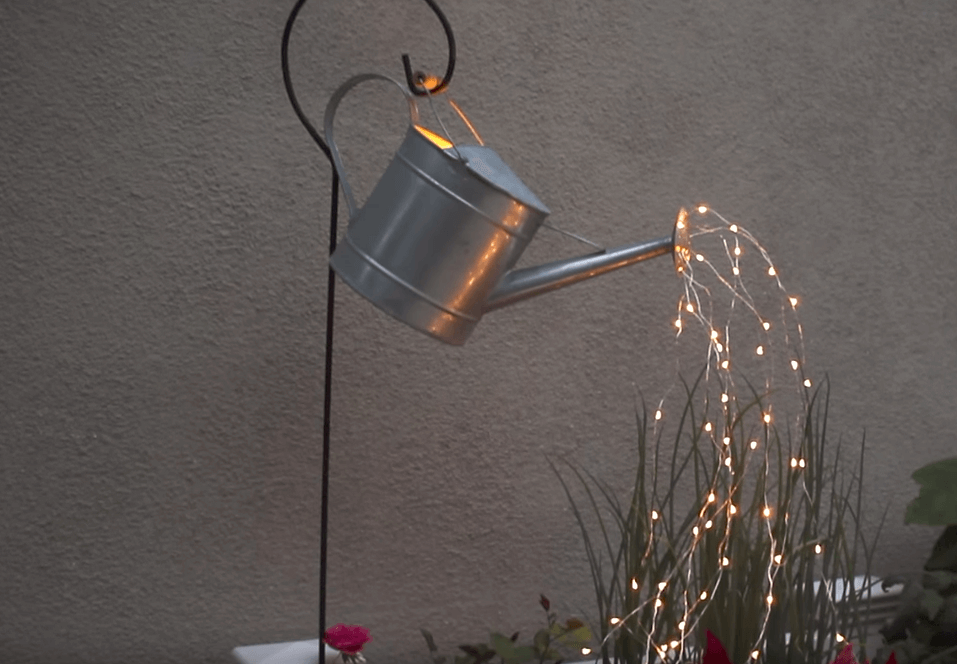
Take an old watering can (preferably translucent), and place your fairy light into it, and take them out just a little bit from its snout and leave it there. When switched on, the lights will look like sparkling water out of a watering can.
DIY Rock Garden Bugs

Use stones/ rocks from your garden, join them together with glue to make it look like a caterpillar or a ladybird, and then add whimsical colors to make em look more exciting and fun!
Tired Garden Planters
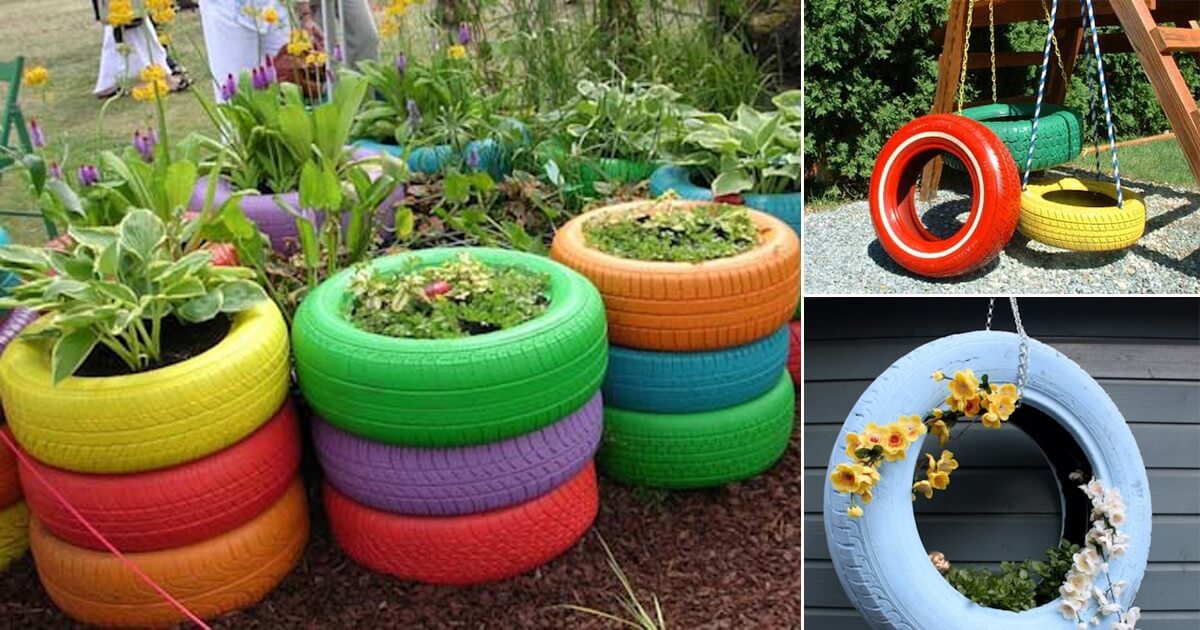
Use old tires to create planters from them. Just attach a firm wooden surface beneath the tire to support the soil and the plants you wish to grow in the tire. The tire is now your planter. Further, paint the tire with funky colors and glitter to make it look far more attractive. You can also make comics or cartoons on the tire.
Soda Can Flowers

You all drink soda from time to time, right? Well, now is the best time to make the best of your house waste. Dig out your old soda/beer cans from the corners of your house, garbage and cut out flower petals from them and paste them together to make them look like flowers.
After painting (optional, because not painting your soda petals will give it a very different and printed look, so it is your choice what kind of look you want), attach them on sticks and into your flower bed.
Keep in mind paint with waterproof paints or apply epoxy (resin) after you are done with your art.